Showing posts with label embroidery hoop. Show all posts

Wednesday, March 11, 2015

Spring Kite Hoop Art


Easy & Inexpensive Spring Craft - Kite Hoop Art


A Cultivated Nest created this adorable and super easy piece of art that would be so cute for spring. I love the simple kites and burlap together!


See the Spring Kite Hoop Art.


Sunday, December 21, 2014

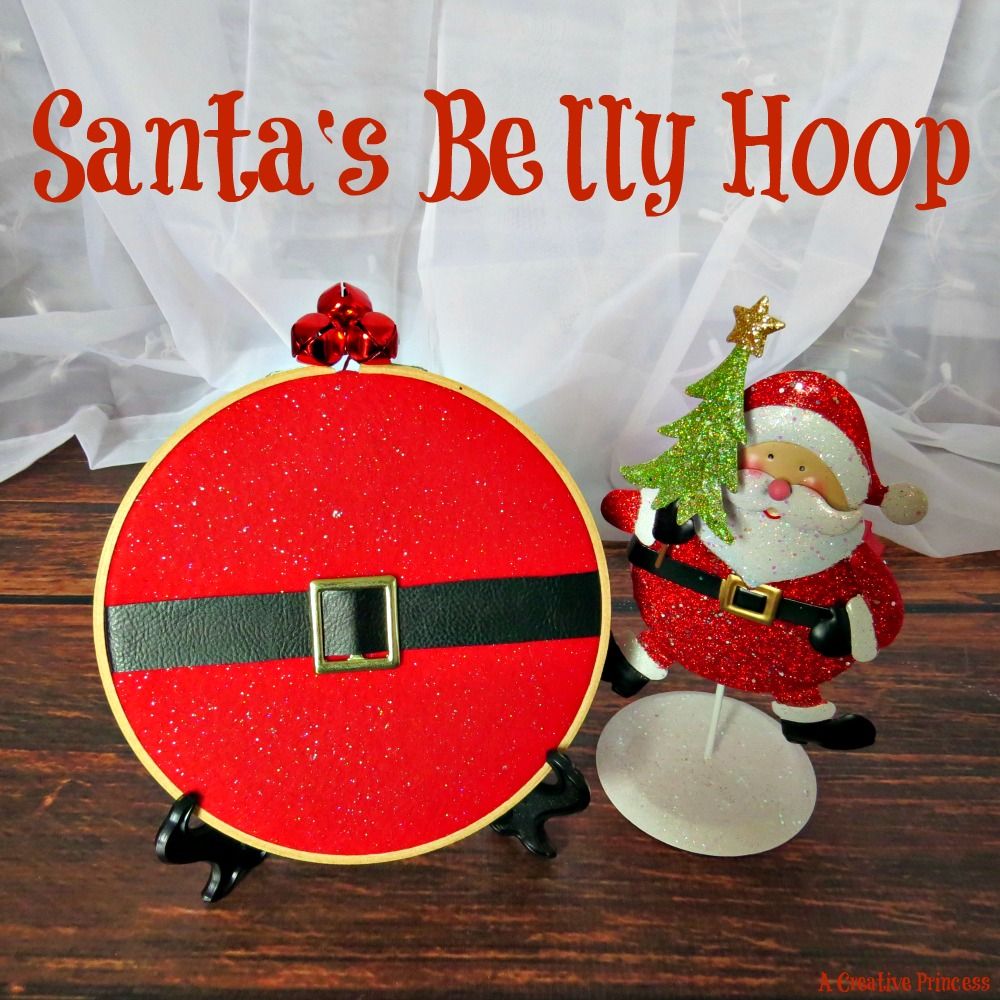
Santa's Belly Hoop


This little santa-inspired decoration is just adorable! A Creative Princess has a super easy way to make your own.


See the Santa's Belly Hoop.


Saturday, October 18, 2014

DIY Bed Canopy


This canopy from Spindles Designs is so whimsy and romantic. This would be fabulous not only in a master bedroom, but for any little girl's room too. Adorable!


See the DIY Bed Canopy.


Monday, September 29, 2014

Be Thankful Fall Hoop Art


hoop art aka design


This embroidery hoop art from AKA Design + Life has such a simple design. I especially love the miniature burlap banner.


Monday, April 28, 2014

Monogrammed Embroidery Hoop Nursery Decor


My little guy's nursery has been slow going. I was on bed rest for a month, delivered 11 weeks early, spent 2 months visiting the NICU, and then I've had a very fussy newborn. I haven't had much time for crafting. And during that time, I went from planning a double nursery to a single one, so all those twin ideas weren't going to work for us anymore.

As I was going through my craft room to get it ready for all the baby stuff, I came across some embroidery hoops that I purchased a couple years ago. I found them at the thrift store and had a specific project in mind. I never ended up using them for that project, but I set them aside and planned to use them in the nursery.


This project is one that I just started on a whim. I didn't really set out with a clear vision, mostly because I was trying to stick to supplies on hand. I spent 30 minutes going through my fabrics, trying to find a set of fabrics that would look good together. I finally settled on dark blue, gray, and white/green/blue/gray striped fabrics. I wanted to use the blue/green/gray combo in the nursery, so it was a win that I had just enough to use!

After picking out the fabrics, that was when the project finally started coming together in my head. I decided to use the striped fabric in the large hoop, then use the blue fabric to make a big "E". The smaller hoops would have more of the gray, blue, and striped fabric in them as accents.


To make this, I used:
  • Embroidery hoops (I have 4 - 3 small, 1 large, but any size will do)
  • Fabric
  • Iron-on fabric interfacing
  • Hot glue
  • Embroidery Thread
  • Buttons
The first thing I did was iron the fabric. It was all wrinkly from being in storage. I started with the small ones - the easy ones. This part is simple. Just find the section of fabric you want to use and put it through the embroidery hoop. Simple.
 
The big one is a bit more complicated. I measured the large embroidery hoop and decided how big I wanted the "E". I cut out a large enough piece of the interfacing and ironed it onto the blue. I used my Silhouette so I could get a good, crisp line. My drawing skills just aren't that good. After cutting out the "E", it was time to iron it to the striped fabric. To get an idea of where the circle would be, I put it in the hoop, tightened it to make an imprint, and then took it out. Then I lined it up and ironed it on. Of course, you'll want to remember to take the paper off the back of the interfacing. It only took me 3 tries to figure out why it wasn't sticking!


To finish off the backs, I just cut off any excess fabric and used some hot glue to keep the edges down.


At this point, I decided it was a little plain, so I pulled out the embroidery thread and a needle. I used it to go around the edge of the "E" for some decoration. I thought about leaving it at that, but then I stumbled across some buttons in just the right color. I sewed 3 of them next to the "E", and it was perfection!


I'm so thrilled with how they turned out. They sat on my ironing board for about a day after getting finished, and I just smiled at them each time I walked by and saw them. I was so excited to get them up in the nursery! This isn't their final placement. I have some other décor that is still in the works. But, he isn't even sleeping in here yet, so no big deal.


I love that I was able to use up some supplies that I already had on hand! What do you think?


Thursday, April 10, 2014

Paper Embroidery Hoop gift Card Holder.


Scrapbook Paper Embroidery Hoop Gift Card Holder

Do you know a crafter that deserves a little gift? How about this cute little embroidery hoop turned gift card holder? This idea from The Casual Craftlete is so sweet!


Friday, March 28, 2014

Crafting for Baby - Pom Pom Baby Mobile from Something Splendid

AAGH! Our Crafting for Baby series is almost over! Can you believe it's the end of the month already? Without further adieu, here's our second to last project... 
__________________________________________________________ 
Hi Everyone! I am Emily from somethingsplendidblog.com. I am the red head in the middle. Our blog is about sharing fun crafts, recipes, fun activities, and beauty ideas- all on a budget. We celebrate every holiday to the fullest, throw lots of themed parties, and travel everywhere we can together. All 3 of us are in college, and while we do not have kids now, we do have nieces and nephews that are spoiled with a lot of our creations.
 
utah
 
We have a really cute mobile to share with you here today. Now our idea may not be the most original, but when I perused pinterest left and right for a tutorial and could not find one, I knew this project needed to be out there.
 
Supplies:
-6 pieces of felt (1 for each pom pom)
-Small embroidery hoop
-Glue gun
-Bakers twine
 
IMG_8630
 
IMG_8632
 
First cut out 1 small circle and 8 big circles from each piece of felt. I freehanded mine, but I made sure to do each color of felt in a different size.
 
IMG_8637
 
To create the pom poms, fold a circle in half and in half again and place a small dot of glue to hold it together.
 
IMG_8638
 
IMG_8639
 
Glue four of the circles to each side of the smaller circle and spread them out to create a pom pom.
 
IMG_8640
 
With your embroidery hoop, take your bakers twine and cut 6 pieces of twine in different sizes. Tie them to the hoop around it and then glue your pom poms to each piece of string.
 
IMG_8648
 
IMG_8654
 
 IMG_8652
 
To finish off the mobile, tie more strings to the hoop to connect at the top and tie a knot. After I took one last piece of twine and tied it to the top of the knot and then to a pin to tack to the ceiling.
 
Pom pom baby mobile
 
Now you have a super cute baby mobile that you can customize to the colors and gender of your baby.
 
_______________________________________________________
 
What a sweet, perfect little mobile! I've falled head over heels for grey, so the pink and grey is just adorable! Thanks, Emily!

Don't forget to check out all of the other posts from our Crafting for Baby series and the Crafting for Baby Link Party. So many good ideas!!
 

Related Posts Plugin for WordPress, Blogger...