


Hi Everybody! My name is Beverly and I blog over at
I am soooo thrilled to be here at Someday Crafts! This is one of my favorite places to hang out.
I love to sew, embroider, make home decor projects, and jewelry! Here are a few of my tutorials.
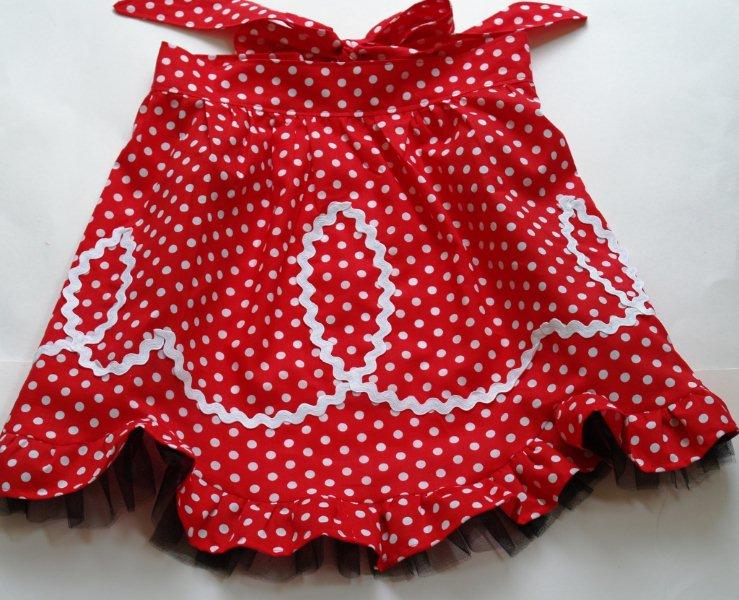
The Retro Ric Rac Apron- so fun and flirty!
This cute little Embroidered Linen Pillow - lots of pleats and trimmed with jute!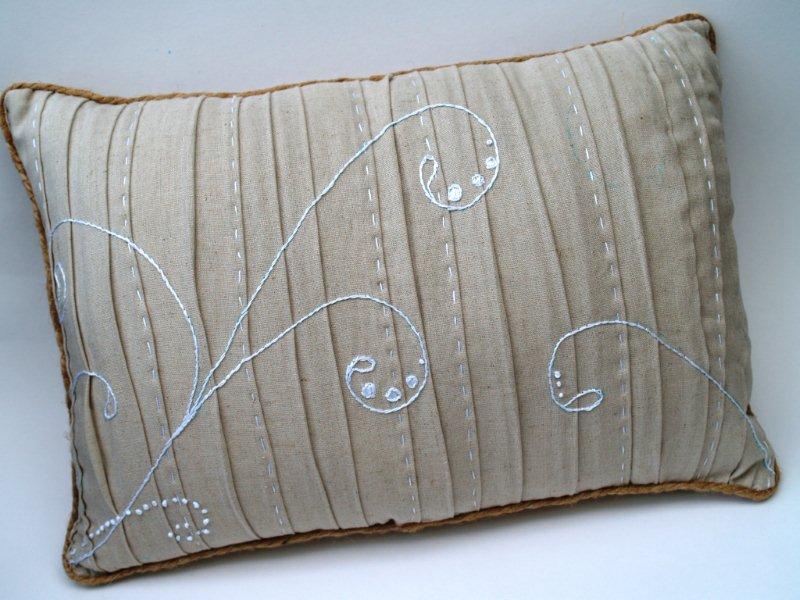
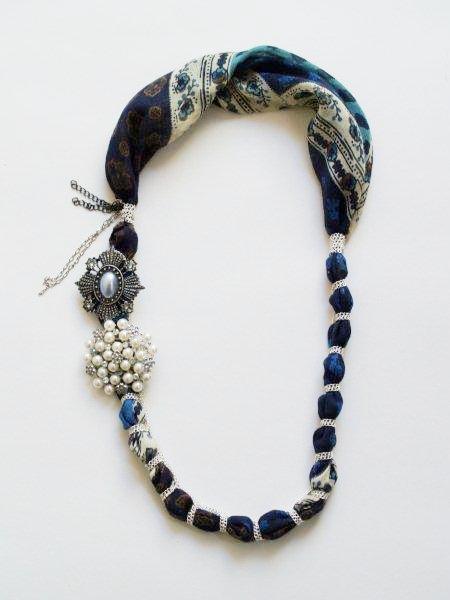
And if you like jewelry, I just finished up Anthro Necklace Knockoff Week!
These are just three of the five tutorials - click on the picture to go to that page.
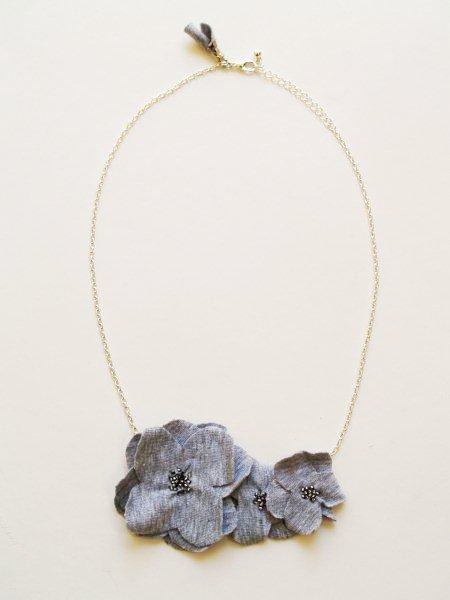
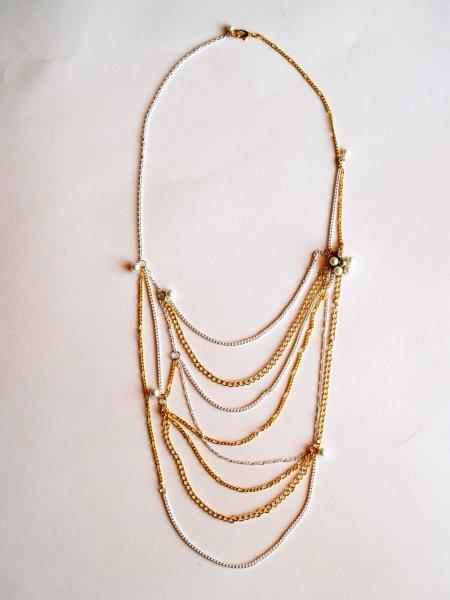
(And if you like these - I'm giving them away! Stop by before Sept. 10 to enter!!)
Today I've got a Halloween project for you!
It's called the
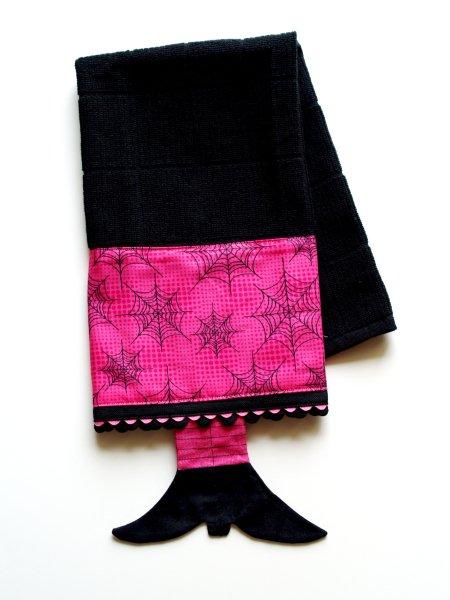
Feelin' Witchy Dishtowel.
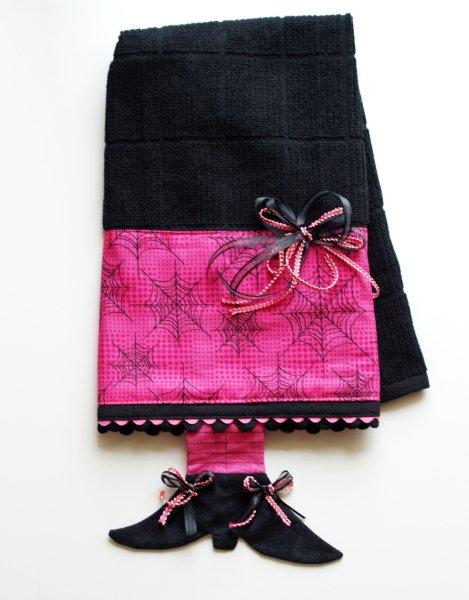
I know. I'm rocking the boat with the pink. But who says that pink is only for Valentine's Day?!?
Plus it's got ric rac. You can't ever have enough ric rac. ;)
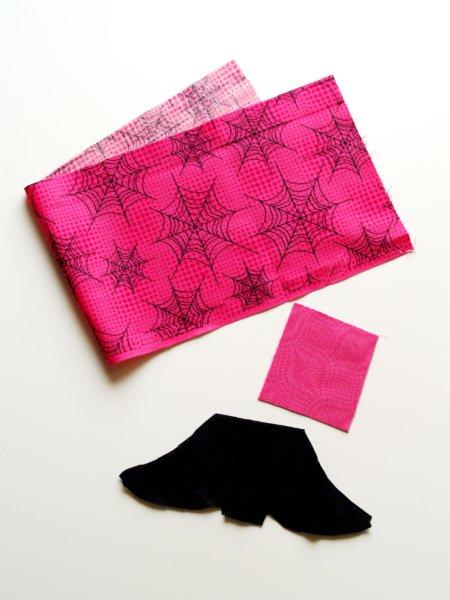
Here's what you'll need to make your very own.
• Dishtowel: I bought mine at Target
• Fabric: Small amounts of three different prints. The pink part is optional.
• 2 Colors of ric rac. Make sure they are two different sizes.
• 2 colors of contrasting ribbon
• Thread and sewing machine
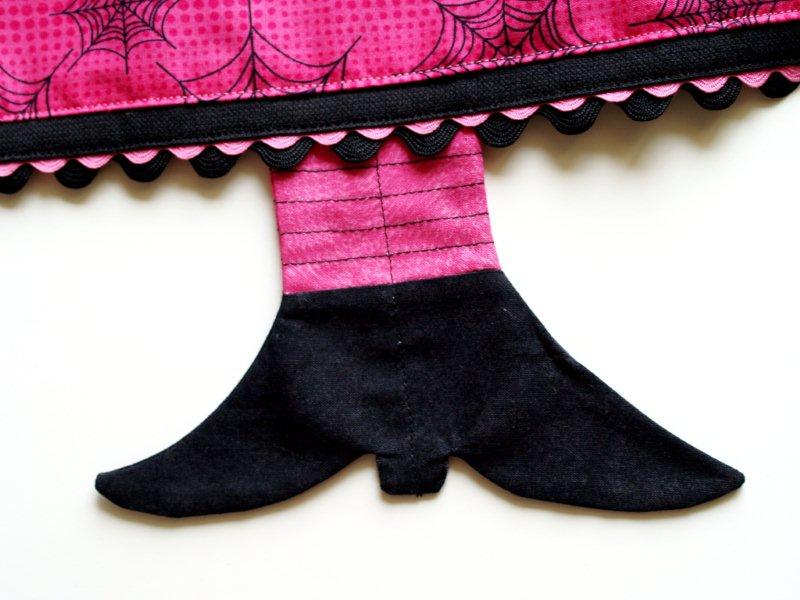
Start by drawing out your witch feet. You want one piece, with a leg section and two shoes.
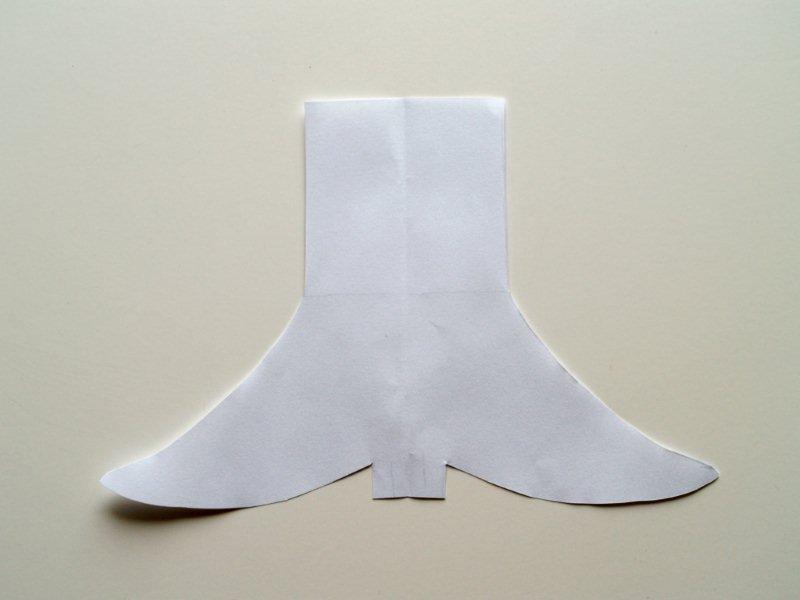
Cut your pattern piece apart where the tops of the shoes would be.
Cut two shoe pieces out. Cut 2 leg pieces out.
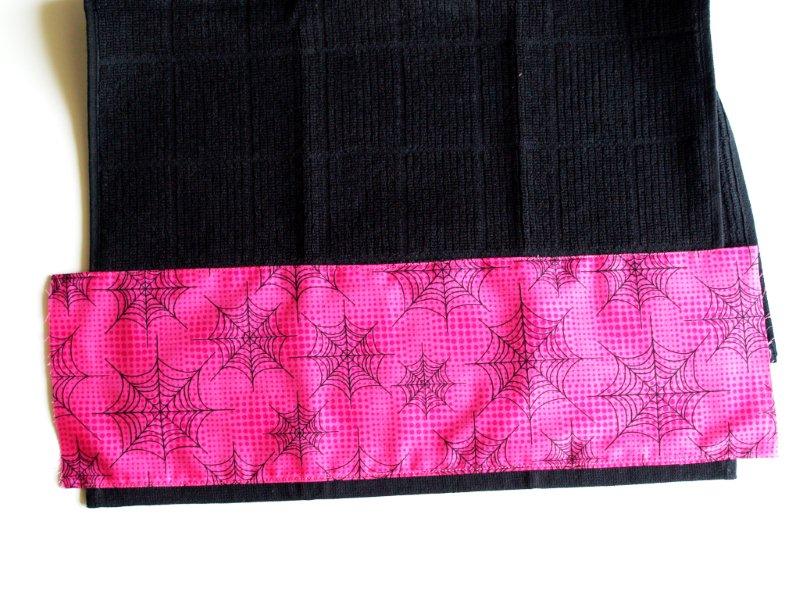
Cut a rectangle of fabric 2 inches longer than your dishtowel and 6" tall.
Press the top and bottom of your larger fabric rectangle down.
Sew it to your dishtowel close to the folded edges.
I left the bottom binding of the dishtowel uncovered for contrast.
Fold one short edge of the fabric under twice and wrap it around to the back of the dish towel. Sew this down close to the edge.
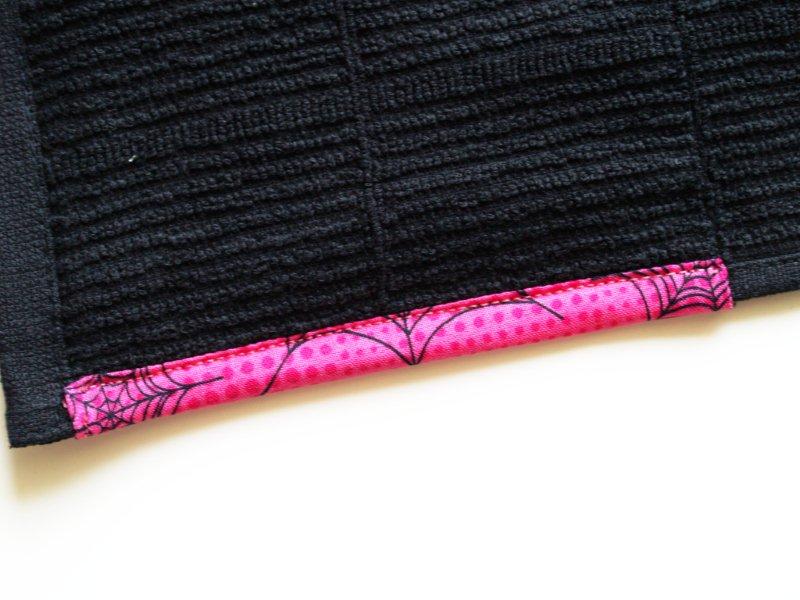
Repeat for the other side.
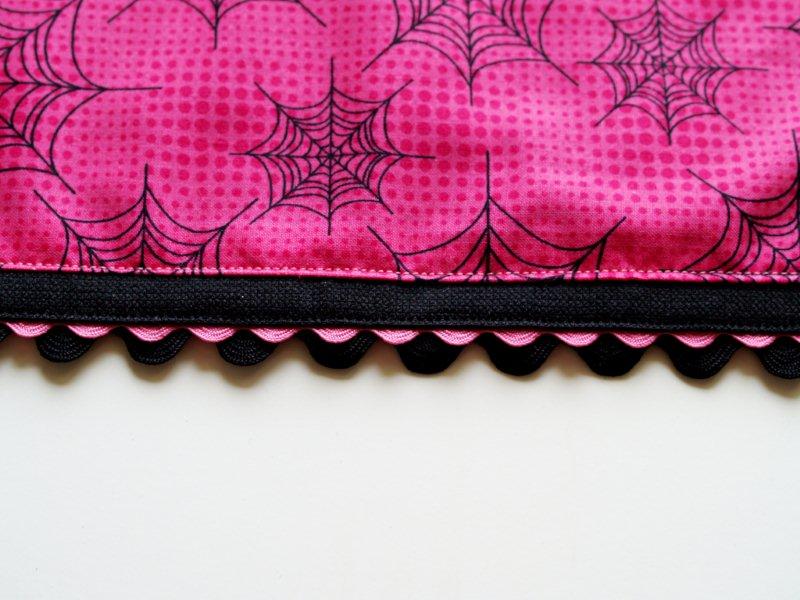
Layer the ric rac so the smaller width is on top of the larger. Place your dishtowel over the layers and sew the ric rac to the back side of the towel so it peeps out. Turn the edges under at the beginning and end as you sew.
Set your dishtowel aside for now.
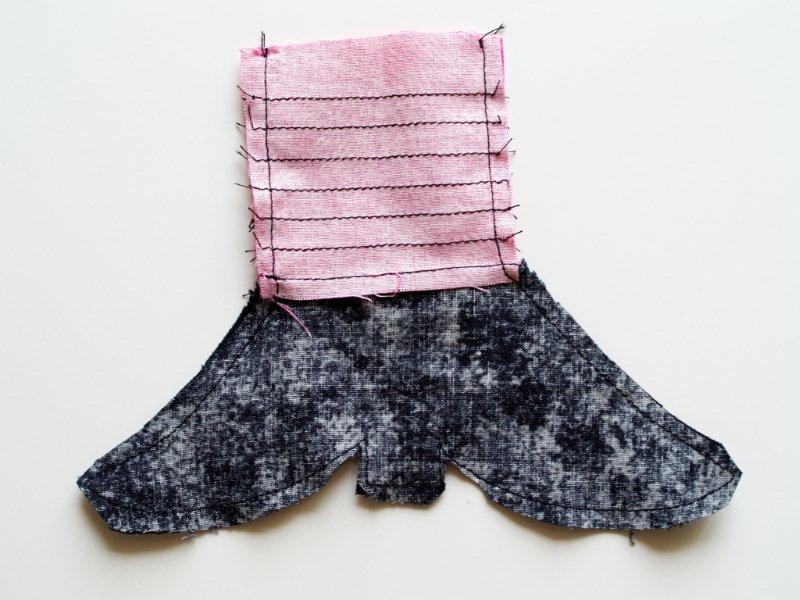
Sew a leg piece to a shoe piece, right sides together. Do this for both pieces.
Press the seam towards the shoe.
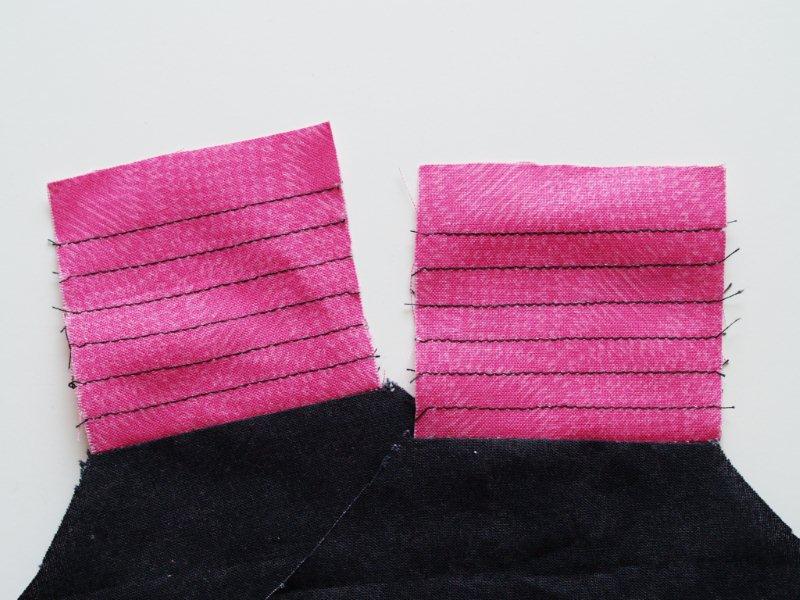
Sew six horizontal lines of stitching to each leg piece. Make sure they're evenly spaced.
You can use the presser foot as a guide.
Place the two pieces right sides together. Sew around the pieces on all sides but the top.
Clip the curves and clip off fabric from the toe and the heel so it turns well.
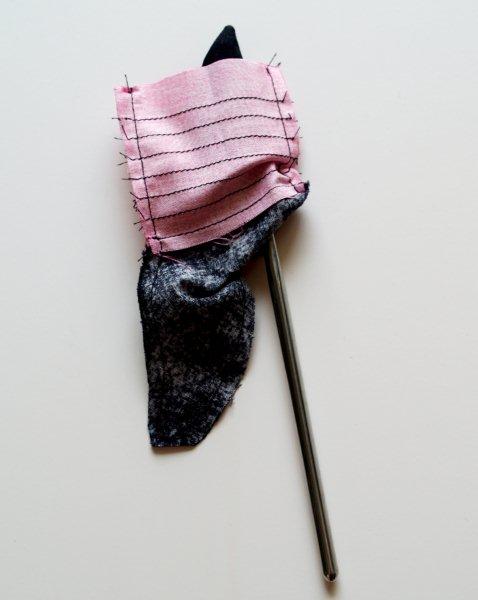
Turn the piece right side out. It helps if you have something pointy, like a turning tool. . .or a chopstick.
Use it to make sure the toes and heels of your boots are nice and pointy.
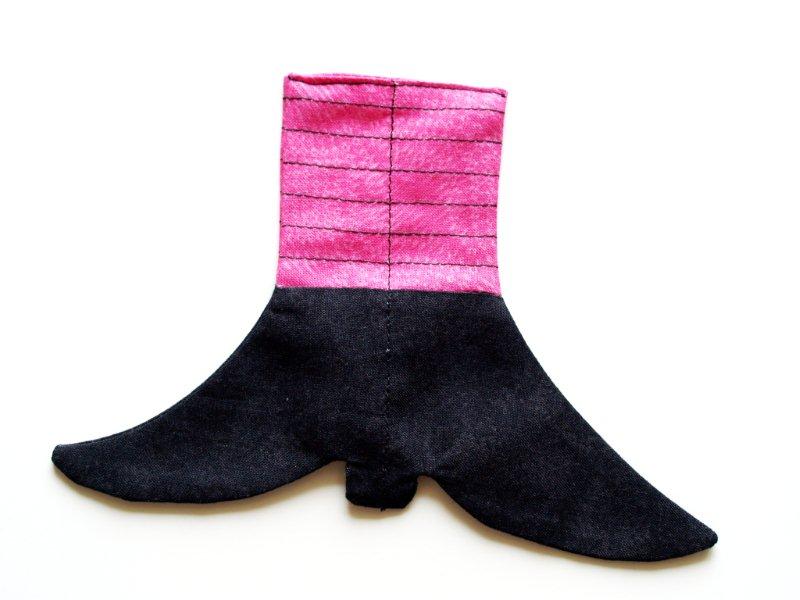
Press the piece well. Turn the top under to the inside just a bit and sew the opening closed.
Fold the piece in half and finger press it to make a line.
Sew down this line to separate the legs and shoes.
Mark the halfway point of your dishtowel and match it to the center stitching line of the stockings.
Sew the stockings to the back side of the dishtowel.
Mmm. So cute!
But it needs something else . . .

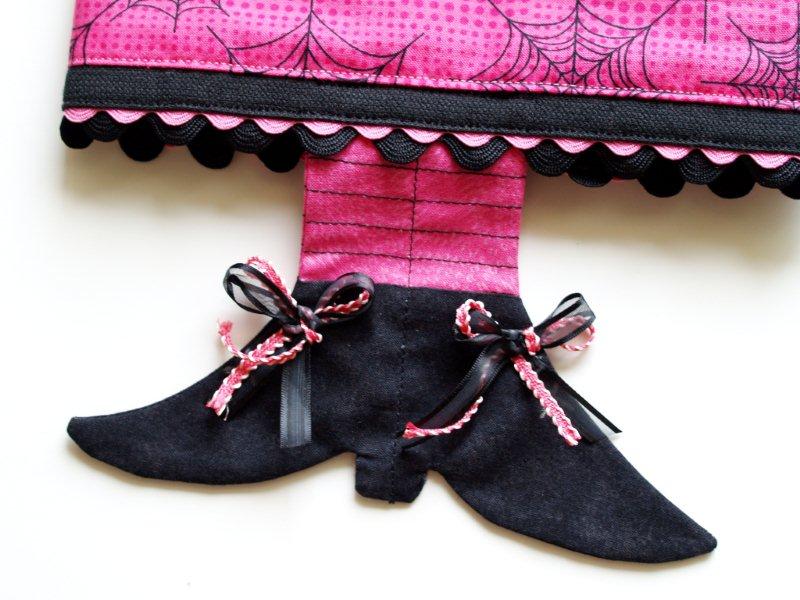
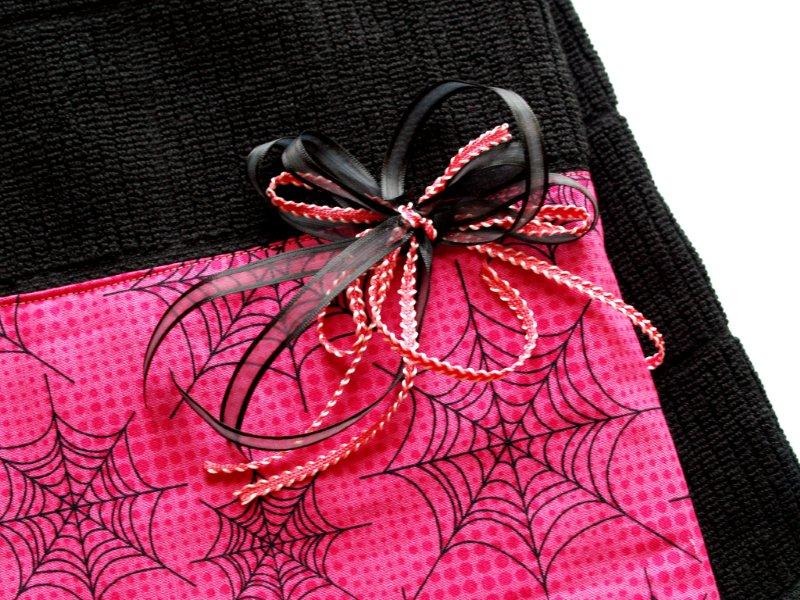
Tie your two contrasting ribbons together to make two very small bows for the boots.
Make two larger bows for the towel and layer them on top of each other.
Sew on all the bows.
I hope you enjoyed the tutorial for my witchy little dishtowel!
I'd love for you to stop by Flamingo Toes and say hi.
Thanks so much Michelle for letting me visit today!
Bev, this is so very witchy cute! Another idea I never would have thought of! If you haven't been over to Flamingo Toes, you are missing out. Bev has amazingly unique ideas, and beautiful projects. I am inspired when I visit her blog. See all the great ideas at Flamingo Toes today and follow Bev's creativity!


How cute is that towel! Love those little funky witchy feet peeking out from underneath. And I agree - pink ROCKS for Halloween.
ReplyDeleteI linked to your tutorial over at Craft Gossip Sewing.
--Anne
Super cute! Beverly is so talented. I love her blog as well! That towel is adorable. Have a great weekend!!
ReplyDelete~Karen @ Pocket Full of Pink
www.karismaheartsavannah.blogspot.com
This is so cute it almost hurts!
ReplyDeleteOMG! Your witchy little dishtowel is so darn cute! I luv it!
ReplyDeleteSo cute....on my to do list. Thank you!
ReplyDeletecreationsbyladeeda.blogspot.com
Super cute! I love the hot pink. Seems like a very *witchy* color to me!!
ReplyDeleteWOW! Bev, this is incredible! I LOVE IT!
ReplyDeleteLOVE the towel, so cute.
ReplyDeleteThat is adorable! My mother requested a Halloween apron for her October birthday...this is the perfect little addition to the gift!!
ReplyDeleteI love this! I just want to go make one RIGHT NOW! I cant wait for Halloween this year.
ReplyDeleteAdorable! So cute!
ReplyDeleteStop it!! That is to DIE for cute. I love it. How easy to embellish a towel. Great tut!
ReplyDeletebibbity, bobbity, beautiful!!! Another great design with an awesome tutorial!
ReplyDeletethis is adorable!
ReplyDeleteI like cute halloween things not scarry.I'm gonna make one
Thanks