


Hi! I'm liZ from over at

Simple Simon and Co.
There, my ridiculously talented sister-in-law (who is also named Elizabeth) and I post our daily sewing, crafting, and kid related projects.
Today we are super excited to be here at Someday Crafts with a little project I've been working on. Among other things I hoard, I mean I collect, vintage patterns. And well, my "collection" had gotten out of hand and I needed some sort of system to store them in. I wanted something that would keep my patterns tidy, easy to access, and look as cute as my patterns do.
Here's what I came up with:

Mod Podge Patterned Pattern Boxes.
They are easy to make and absolutely perfect to store your sewing patterns in.
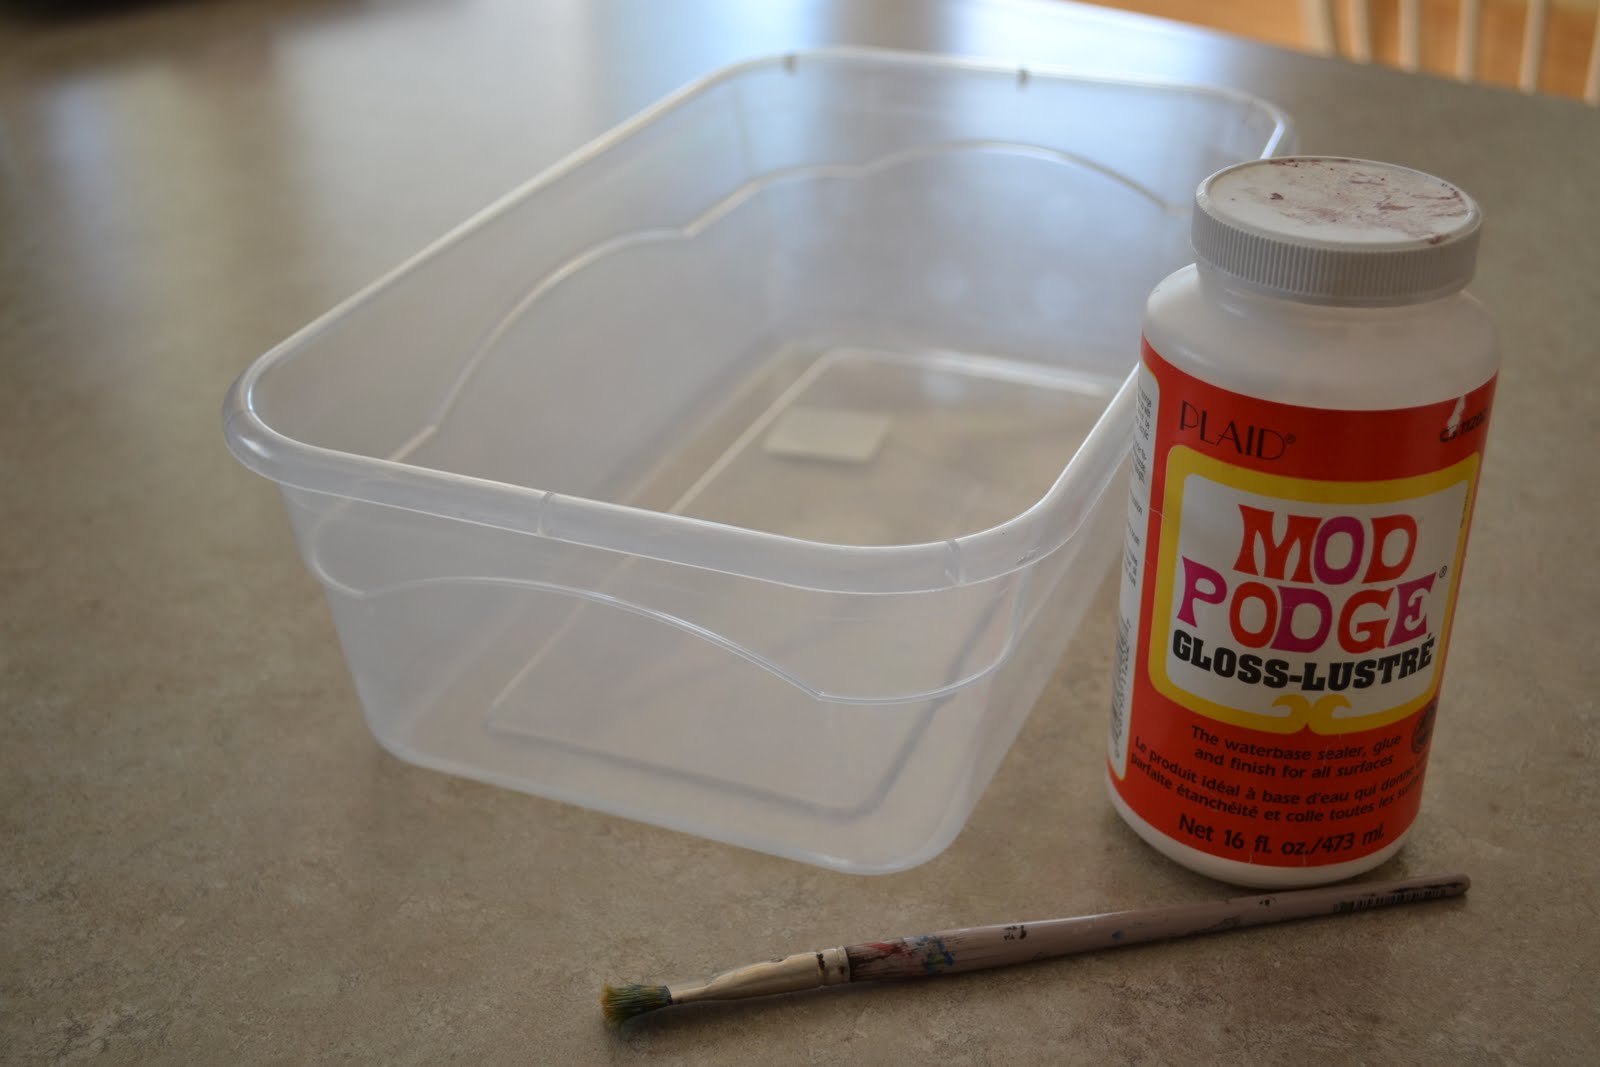 Here's what you'll need:
*5 Quart storage bins (I bought mine at the Dollar Store but they also sell them at Wal-Mart)
*Mod Podge
*An old paint brush
*Some old patterns that you are willing to part with

Just a note here about the patterns---I can't bear to see any potentially good patterns being wasted---even if it is to decorate something I want. SO I chose patterns that should never ever be sewn again to use for this project. That way I wasn't destroying something that I may want later and I was saving the planet from pregnant women walking around wearing that red jumpsuit.
Now. On to the instructions:
 #1. Using your paintbrush, slather some Mod Podge over the area of the bin you are going to start covering.
 #2. Lay a piece of pattern over the area covered in Mod Podge. Press it down firmly with your fingers or the paintbrush. (Note: Patterns are very thin so be a gentle...)
 *Don't worry about having to fold the pattern over on itself around corners. That will happen. As for the wrinkling...don't worry about that either. Wrinkles happen and it's ok. It will give your bins texture and character.
 #3. Use large pattern pieces first and then fill in any blank areas with smaller pieces. Do this until your entire bin is covered with patterns.
 #4. When your bin is covered go over the ENTIRE surface with your Mod Podge. (This will give the frail pattern paper a protective layer that will become hard and prevent your bin from getting rips and tears. Plus it makes it look shiny and cool.)
 #5. Hot glue a big old ribbon to the front. (I used strips of scrap fabric to make mine.)
 And now your done!
 (However, if you are really particular about your patterns you could skip the bow and make a cute label for the front detailing the sizes or styles of patterns in each bin. Obviously I didn't do that with mine...as per most of my projects I chose fun over practicality...)
I love my little army of pattern boxes. They are exactly what I needed--I can easily flip through the contents of each bin, the patterns are organized by size and style, and of course, they look good on my shelf. It was just what I needed.
Thank you, Michelle, for letting us share one of our projects amid so many other amazing tutorials. We have been so excited to be a guest on your amazing blog and we had a lot of fun putting together our project.
Thanks again,
liZ
THANK YOU, liZ!!!! My favorite projects are ones that are quick, simple, inexpensive and turn out really cute and this is definitely one of those "favorite" type projects!
Head over to Simple Simon & Co to check out all the AMAZING tutorials and ideas there. You will spend hours looking around!


Come on Liz, you know you wanted to wear that red jumpsuit....
ReplyDeleteDarling...now don't you want to make me some?
I love this! I think I am going to have do this for my patterns too. Thank you for sharing this great idea!
ReplyDeleteSuch a cute idea! Thanks for sharing and have a wonderful weekend!
ReplyDeleteAledia~
Super cute!
ReplyDeleteJust a quick note to let you know that a link to this post will be placed on CraftCrave today [23 Jul 01:00am GMT]. Thanks, Maria
ReplyDeleteMod Podging with pattern pieces is just about my favorite thing ever. Fun!
ReplyDeleteThis is a terrific project! Thanks for sharing it with us!!
ReplyDeleteGreat idea and looks so nice.
ReplyDeleteThis is such a super cute idea and fun!!! Thanks for sharing!:)
ReplyDelete~Vanessa W
Hello! I'm new to the mod podge and crafts overall! I love the idea, just a question...did you do the inside of the container...and the ends of the container that curve out...does the paper go under and over the curve or is that a separate piece you placed. I'd appreciate the help.Thank you!
ReplyDeleteSo clever!! Love this idea!!!
ReplyDeleteShannon