This is another guest blogger re-run from one of my first guests! I love this tutorial!

Hi everyone, I am Bird from the Blog
I live in France with my husband, my two little cherubs (most of the time..), my dog and my sewing machine. We used to live in the England, but moved here nearly ten years ago to start a brand new life à la française! Since discovering the wonderful world of crafts, I am totally hooked and can honestly say that “I’d rather craft than bathe?!” (lol)
I started blogging last November and I’m loving that too! I love to chat and to write (as you’ll find from this post) but I also enjoy making new friends. So feel free to leave me looooads of comments!! :)
At Bird Crafts, I blog about sewing, DIY, home décor, party ideas, thrifty finds, tutorials and recipes - If it’s handmade, chances are I’ll post about it! So after reading this, don’t forget to pop over and have a snoop around!!
Now to the reason I’m here: TUTORIAL TIME.
They are very simple to make and so versatile. Think gift ideas, decorative items for your home, or a party table centre-piece!! If you make this or use it in a craft project, please don’t forget to link back to Bird Crafts!
At the end of the tutorial, you can visit my etsy shop, so keep reading…
What you’ll need:

- Patterned fabric for the flower petals. I’m using yellow gingham.
- White fabric for the flower centre.
- A small clay pot
- A 23 cm piece of dowel rod or bamboo
- Florist tape
- Fabric pen or pencil
- Needle and thread
- Scissors
- Floral sponge (oasis)
- Natural moss
- Synthetic or bamboo fibre
- Glue gun
How to do it:
A. The Flower Head
Using a saucer or round lid as a guide, draw and cut 5 circles from your patterned fabric. I used a 10cm diameter lid.
Draw and cut 2 more circles from the white fabric. Now you have 7 circles!
Do a running stitch around the edge of each circle as shown below
When you’ve gone all the way around, pull the thread slightly to get a small “pouch” and fill with the fibre.
Finish pulling the pouch closed and secure with a couple of stitches.
Now to assemble the flower head. Starting with the petals (patterned fabric), stitch them side by side until you have all the 5 petal joined up.

Using your glue gun, now glue the flower centres (white balls) in the gaps to get the flower head you see above.
B. The Flower Stalk and Pot

Cover your rod or bamboo stick with the florist tape.
Stick your floral oasis into your clay pot and using the glue gun, glue the stalk in the centre.
Using the glue gun again (I just want to kiss the person who invented this!!) glue some moss to hide the floral oasis.
Finally, carefully pull apart a couple of petals on the flower head, apply some hot glue and secure it to the stalk.
Embellish the vase to your liking. I used ribbon and a fabric-covered button to match.
And there you have it, a cute little Flower Pot that would brighten up any window sill!!
If you don’t fancy making these yourself, I am selling them in my Etsy shop :) I also sell plush tulips.
Thanks again Michelle,
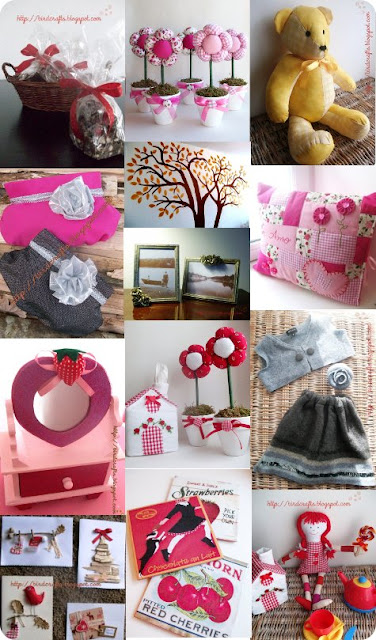
Wow! Thanks, Bird. Are those Plush Flowers in Pots cute or what? I could see a few of them in different colors throughout my house - especially in my daughter's room. Bird Crafts is an amazing blog (and she speaks three languages). Don't you love the collage of some of what you can find on her blog? EYE CANDY!!! I love her etsy store too! Go visit Bird Crafts today and become a follower if you like what she creates!


OMGGGG this are too adorable and thanks for sharing the tutorial:) Happy Saturday!!
ReplyDeleteHugs
Oh! How Darling! This would make such sweet centerpieces for a party! Thanks for sharing!
ReplyDeleteOh that is the best thing I've seen all day. For my wedding favors (5 years ago), we had those flower pots painted white on the outside and red on the inside with red bows around and a candle inside. Of course I still have about 10 of them, and now I know what to do with them!
ReplyDeletethanks for sharing!
супер!!! обязательно попробую такие цветочки сделать...
ReplyDeleteвот мои http://planeta4ydes.blogspot.com/2011/06/blog-post_19.html
http://planeta4ydes.blogspot.com/2011/07/blog-post_11.html
Oh yes I love these too :) have made several of these for friends and family and they are always much appreciated :)
ReplyDeleteThese are looking very cool and pretty. I am loving it.
ReplyDeletetoy flower ! it very nice and cool pretty flower
ReplyDeleteFlower delivery London