
I love to invent and create things around my home for practical uses. But I do so inexpensively and with my own little flair.
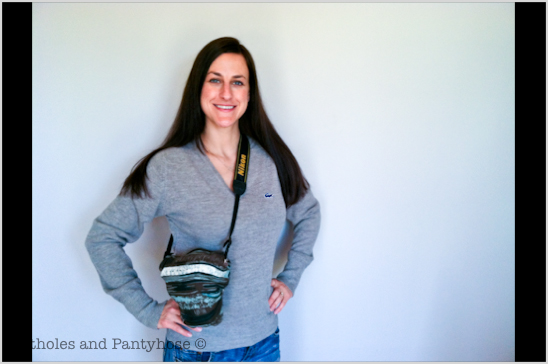
Today, I have a low cost and simple way to make your own Padded Camera Case that fits a professional Nikon, Canon, or similar body styles.
I love to throw my camera in my purse or tote, but hate the thought of the scratching the lens and body. All the pre-made cases I looked at were expensive and boring. I grabbed some scrap fabric, pillow stuffing and a spool of thread to invent my very own Padded Camera Case.
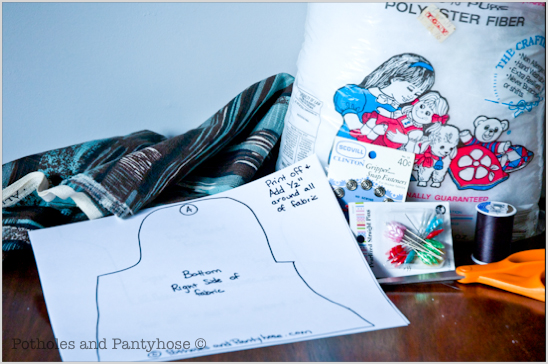
Here's what you'll need to make your very own Padded Camera Case:
Pattern
Pillow or Quilt Stuffing
Scrap Material (approx 4' x 4')
Thread & Bobbin to match
Velcro, Snaps, Buttons
Scissors
Sewing Machine
Tape Measure
Straight Pins
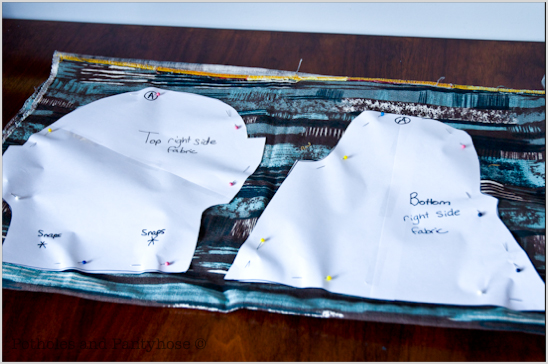
Begin by printing off the pattern. Double fold the material, right sides out, and pin the patterns to it.
Cut the patterns from the material. Remove the patterns from the fabric. With right sides in, pin the "bottom" of one piece of fabric to the "top" of the other. You will now have two sets of pinned material.
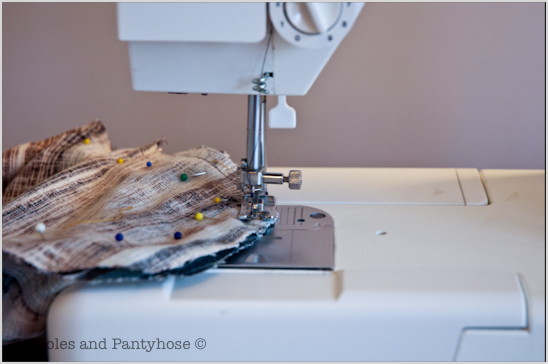
Stitch 1/4" from the edge of the fabric on all three marked sides-leaving the bottom open.
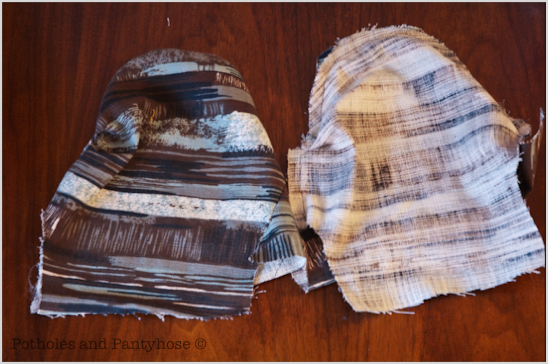
Turn one set of fabric right side out, while leaving the other set inside out. Place the "inside-out" set inside of the "right-side out" set.
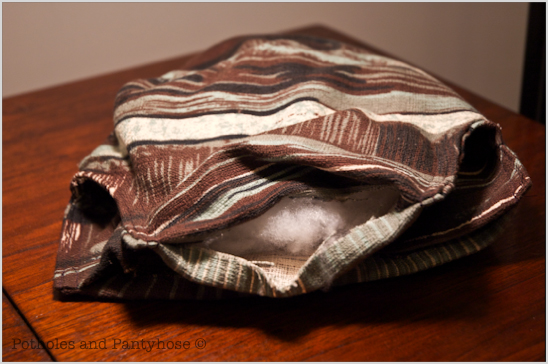
Lightly stuff in between the two sets with pillow or quilt stuffing.
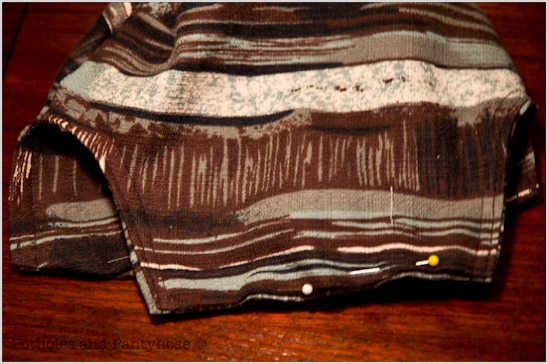
After stuffing the camera case, pin the two openings closed. Insert the desired camera into the case and confirm that it fits-remove or add stuffing if neccessary. Next, stitch each of the openings shut.
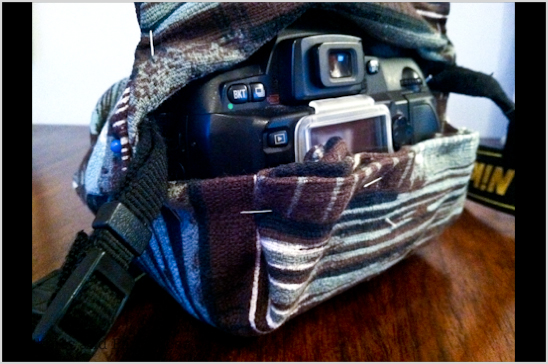
Using the locations marked on the pattern, determine the location of the snaps, velcro or buttons.

Apply the snaps, velcro or buttons according to the manufacturer's directions. I chose to use snaps, just because I like the way they sound when you "snap" them closed....
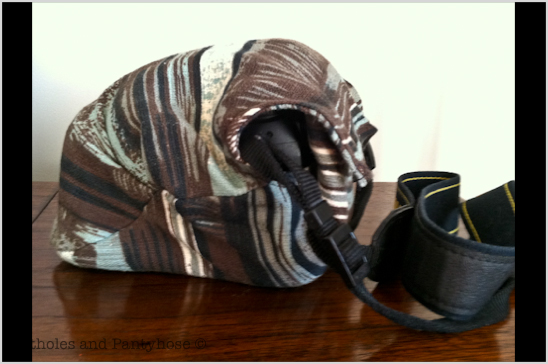
Snap, velcro or button the camera inside of the case, making sure it fits snugly.

Throw your fancy new case around your neck and galavant off to a night on the town, now largely unecumbered by your camera bag-I can't say anything in regards to the heels you've chosen.
Michelle, thank you for having me here at Someday Carfts today! Please stop by my site, Potholes and Pantyhose, for more recipes, crafts and remodeling projects.
I would love to hear from you, become your friend and get to know you a little better. Love-Rebekah.


Perfecto!
ReplyDeleteEs una gran idea!
Perfect! Is a great idea!
Charo
www.cosiendoyaprendiendo.blogspot.com
It's kind'a like a cool stylish diaper wrap only for a camera huh?
ReplyDelete~Bliss~
Great tutorial! I wish I had a nice camera to make one of these awesome cases for, lol! It's on my wishlist!!
ReplyDeleteJen
www.craftincowgirl.blogspot.com
Thanks so much for allowing me to guest post today! And, I hadn't thought about it-but Bliss, I suppose it is bit like a diaper wrap for a camera! :) Thanks
ReplyDeleteThank you so much for this post. I want to let you know that I posted a link to your blog in CBH Digital Scrapbooking Freebies, under the Page 5 post on Feb. 07, 2012. Thanks again.
ReplyDelete