


Hey Someday Crafters! Marta from Something Good is here with the next project in our Crafting For Baby series.
________________________________________________________

Hi! My name is Marta. I’m super excited to guest post here at Someday Crafts. Most of the time I write on my personal blog, Something Good, which is, let’s be honest, pretty much just a homage to my three-year-old and seven-month-old—both of whom are growing up way too fast for my liking.
Anyway, back to the craft. Some moms have their nursery completely done before baby arrives. (And I envy those of you who do!) Not me. My son is over half a year old and I’m still putting the finishing touches on the room he shares with his sister.
As I was looking for wall art ideas on Pinterest one day, I stumbled upon some animal silhouette art. I’m not sure why I didn't pin it (so sadly I don’t have the original inspiration), but I do remember thinking in my mind, I can do that!
This craft is super easy, and I can break it down using 9 materials and 8 easy steps.

MATERIALS NEEDED
- Animal Silhouette Printouts (Download them all at the end of this post. I suggest printing them out on cardstock so they’re a bit more durable when you trace them onto your wood plaque.)
- Scissors
- Wooden Plaque (I bought mine at Michael’s for about $1.50. You could use any sort of wood that you have around.)
- Wood Stain
- White Sharpie Pen
- White Craft Paint
- Paint Brushes (various sizes)
- Varnish (optional)
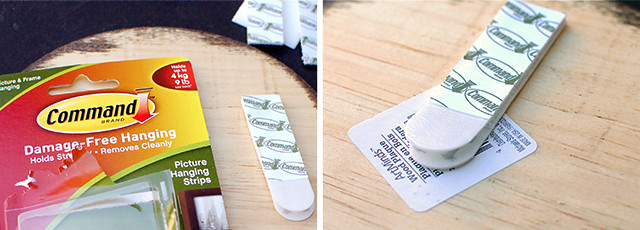
- Something to hang them up on the wall (I used a 3M Velcro hanger; saw tooth hangers like these will do as well)
STEPS
1.) Prep the wood by sanding and wiping off with a damp paper towel.

2.) Brush on stain going with the wood grain. Let it set for about 15 minutes in order to get a deep, dark color. After you've let it set, wipe off with a cloth or paper towel with the grain again, and set aside to dry.

3.) If you haven’t done so already, print out the animal silhouettes of your choice and cut out. Don’t worry about cutting too carefully—it doesn't really matter since you’re going to be tracing and filling these in for the final piece.

4.) Using your white sharpie, paint pen, trace around the cutout silhouette.
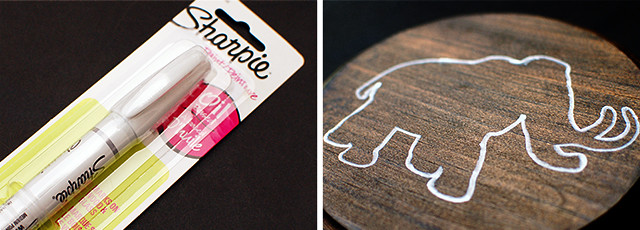
Side note: Here’s where I’m going to keep it real. I totally thought that I could do this craft using just a white, sharpie pen. Now all you craft veterans probably saw this coming, but what ended up happening was when I colored in the silhouette with the pen, the marks from the pen started showing up instead of a clean fill. (Sort of how it turns out when you color with markers on paper, you can see the marker lines.)
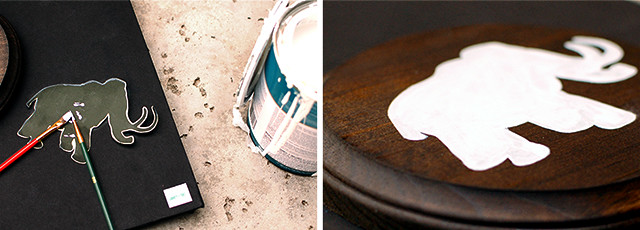
So I rummaged around my house for some white paint and ended up using some paint that we used for our built-ins. If I were to do this again, I would go and buy some white craft paint since the household paint seems to thicken quite a bit on the smaller craft brushes. I do still suggest using the white sharpie pen to outline your animal silhouette. It allows you to paint inside much more quickly rather than having to keep your hand steady with a brush in order to create your outline.
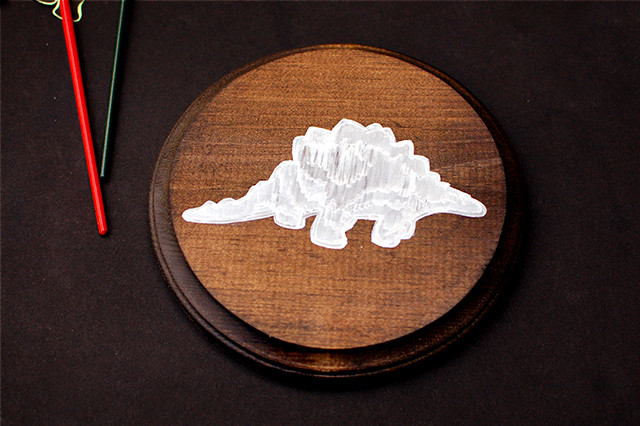
5.) Using a small brush and paint, fill in the silhouette. You will probably need to do two or three coats to get a clean fill.
6.) After they have dried and set, you can give them a glossy lacquer if you want. Totally up to you. I think both finishes look great.
7.) To hang you can either use some 3M Velcro hangers like I did, or, as I mentioned in the materials list, you can install some saw tooth hangers. Either way is pretty easy.
8.) Hang those babies up, admire your craftiness and be sure to pester your significant other numerous times about how cute they are. (I might know this from experience.)
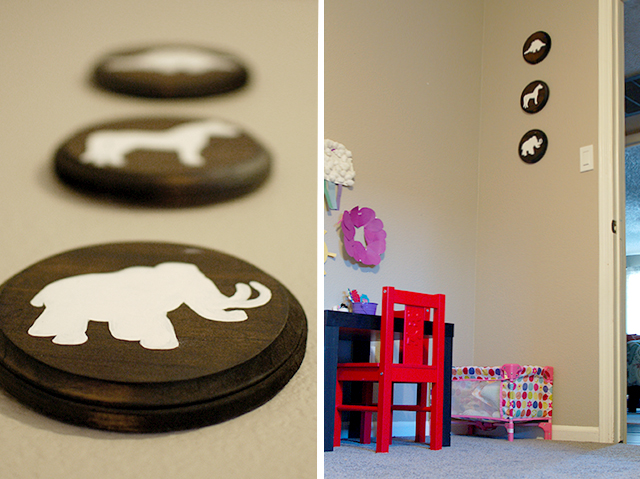
I think these wall plaques would make a great homemade baby gift. They’re inexpensive, but still look neat, and it doesn't take long to do (I spent two lunch hours creating these – you could easily complete them in one evening sitting.) In fact, one of my friends just called me up a couple of weeks ago and broke the news that she was having twins (yeah… twins!), and I may just whip up three of these for her as a little gift for the big announcement.
The animal themes included here are:
6.) After they have dried and set, you can give them a glossy lacquer if you want. Totally up to you. I think both finishes look great.
7.) To hang you can either use some 3M Velcro hangers like I did, or, as I mentioned in the materials list, you can install some saw tooth hangers. Either way is pretty easy.
8.) Hang those babies up, admire your craftiness and be sure to pester your significant other numerous times about how cute they are. (I might know this from experience.)
I think these wall plaques would make a great homemade baby gift. They’re inexpensive, but still look neat, and it doesn't take long to do (I spent two lunch hours creating these – you could easily complete them in one evening sitting.) In fact, one of my friends just called me up a couple of weeks ago and broke the news that she was having twins (yeah… twins!), and I may just whip up three of these for her as a little gift for the big announcement.
For the plaques in this tutorial, I ended up using two prehistoric creatures and a horse, because when your daughter’s latest obsession is horses and you tried to implement a dinosaur theme for your son’s half of their room, you go with it.
Now, I know that not everyone has a dinosaur/horse them going on, so I've created a PDF of animal themes that you can use for your own personal project. All you need to do is download the PDF file, print out the pages you want, and use them as you see fit.
The animal themes included here are:
- Farm Animals
- Prehistoric
- Woodland Creatures
- Zoo Animals
______________________________________________________
Thanks Marta! Those little plaques are so cute. I love the cute zoo animals, which is close to the theme we've got for Emmett's room. Be sure to check back tomorrow for another project in our Crafting for Baby series!!!


0 creative comments:
Post a Comment
Thanks for leaving a comment. I always like to know what you think of the projects I highlight!