I'm back (finally) with the birthday banner that I made to go with the birthday wreath from last week. It's hard to find time to craft with a little one in the house. If you'll remember, BurlapFabric.com sent me some products to use and review, plus they're offering a $40 credit to one lucky reader!
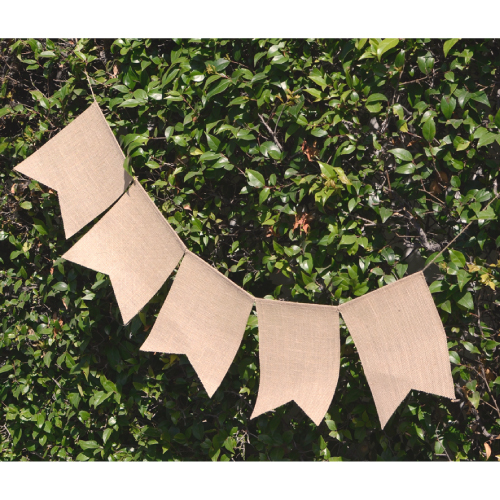
The supplies from BurlapFabric.com really made this a quick, easy project. The banner pieces come pre-cut and strung together in sets of 5. But they're super easy to string together if you need them longer (like I did with the word "birthday"). It's also easy to move them along the string. They're a smaller woven burlap fabric and have a vinly coated backing to help them stay stiff and not fray. They have not only this swallow tail shaped banner, plus the typical triangle pennant banner. Also, don't be fooled by the picture - these are actually pretty large pieces, about 8"x10".
So to make this banner, here's what you'll need:
- Glue Gun
- Ruler
- Sharpie
- Letter printed to size (mine ended up being about 4.5" tall)
- Scissors
Next, I cut out pieces of the burlap ribbon to fit across the top. Once they were cut, I started gluing them on. I glued at each end and in the middle. This was sufficient for almost all the pieces. Occasionally I had to add another dab of glue if the ribbon was really lifting off the banner piece.
When you're gluing, be sure to press carefully. The hot glue will squeeze up between the weave in the burlap and you could burn yourself. I did most of the pressing with my fingernail instead of the padding of my finger.
After the burlap ribbon pieces were all glued on the banner pieces, I pulled out the letters to start tracing. The letters were dark enough that I could see through the banner enough to trace the outline. In the picture below, you can see the "A" behind the banner, to the right of the "H" that I traced.
After tracing the outline, I just filled it in with the Sharpie. Be aware that rubbing it over the burlap will start to weaken/ruin the tip of the Sharpie. I could tell this was happened towards the end of the outlining because the edge wasn't as sharp as it was in the beginning. This wasn't a big deal for me, since I was using an older, thicker Sharpie anyway.

After all the letters were outlined and filled in, I was basically done. I didn't have to do much with the "happy" part except scoot the letters closer together and cut off the excess string. The "birthday" part was a little trickier. I had "birth" and "day" that needed to be strung together. I figured out placement for "birth" and "day" on the strings, cut off a large amount of excess, and then tied a tiny square knot at the ends to join them together. The knot didn't easily go through the opening at the top. But I used the tip of my scissors to help open the end of it, and then the knot easily went through. I don't have a picture of that process, so I hope my explanation made sense.
Then it was just a matter of hanging up the banner. Because of the wall that I used, it was hard to get any kind of angle except straight on.
Here's the Looped Burlap Ribbon Birthday Wreath that coordinates with the banner. Cute together, right?
And there you have it. No-sew, super easy birthday décor! Don't forget to enter the giveaway from BurlapFabric.com for the $40 credit to their store. They have so many cool things to offer!
(Please note that
BurlapFabric.com provided me with the products of my choice to the create the project(s) of my choice in return for writing a post with my honest opinion. They're also providing a giveaway for $40 for one Someday Crafts reader.)


0 creative comments:
Post a Comment
Thanks for leaving a comment. I always like to know what you think of the projects I highlight!