


Hello Everyone! I'm Stephanie Lynn from

I am thrilled to be here today visiting Michelle's blog. {isn't it the best - all these amazing projects in one place ~ I can not get enough of the inspiration here}
At my blog, Under The Table And Dreaming, I create all kinds of things for my home. Come visit me and see some of my other creations!!!
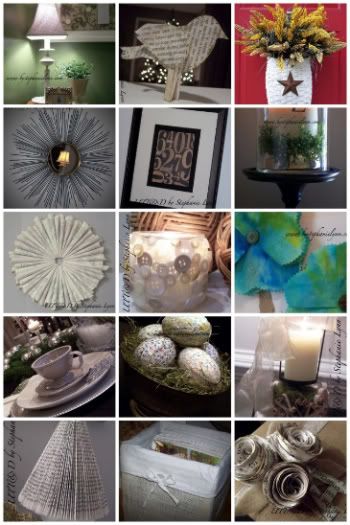 If you see something you like in one of these pictures, come visit my blog and get the tutorial.
Today I'd like to share a little 'nesting' craft with you all. I have had this in my own 'someday craft' file since Pottery Barn put it up on their website for spring. . I love the challenge of remaking a brand name piece ~ it's a little something that keeps me creating.
Materials needed: Yarn, Fabric Stiffener, and a balloon. {It's that simple}
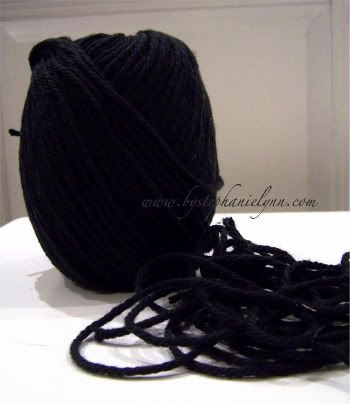 I began by cutting the yarn into 6-8 inch strips. You will need quite a few and it's better to have them pre-cut. I used a cotton worsted weight yarn; however, this project will work with any type.
 I blew up the balloon just a bit to create my form then placed it, tie side down, in a bowl to have a nice sturdy working space.
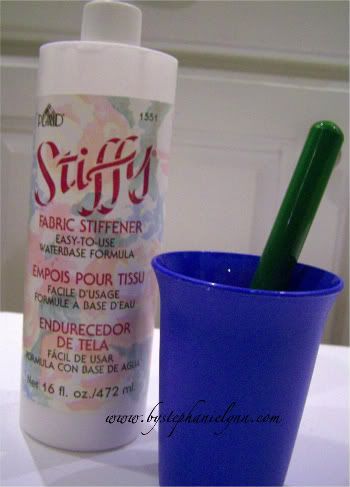 The secret ingredient for this project...Fabric Stiffener. {I used Plaid 'Stiffy' brand} You can find it in the sewing section of your local craft store.
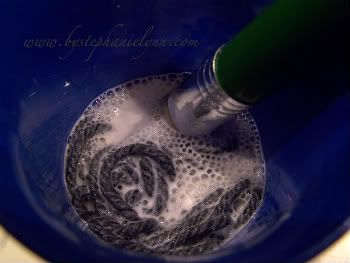 Place 5-6 strands of yarn at a time in a cup and pour enough stiffener in to completely cover. You want the yarn to sit for a few minutes to become totally saturated.
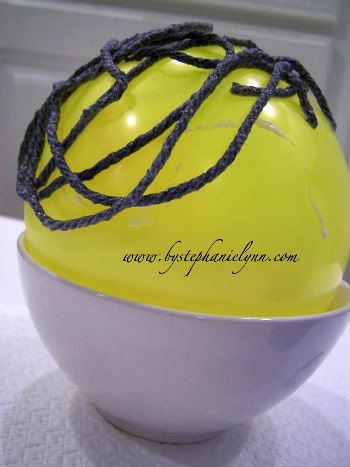 Working with one strand at a time, place the yarn on the balloon overlapping and layering pieces as you go.
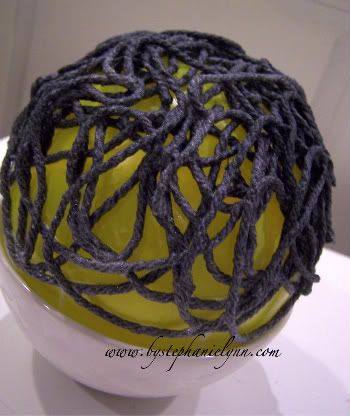 Keep going until you have the entire balloon covered. You’ll definitely want to work on a protected space as this gets a little messy.
 The hardest part is waiting for these little guys to dry. I waited 48 hours to ensure the yarn was completely hardened. The fun part is deflating the balloon. Turn the balloon over in the bowl and cut a small hole near the tie to slowly release the air.
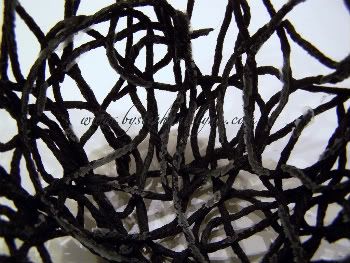 If there is any residue left on the inside of the 'nest' {as I had above} you can easily cover this up with a light coat of black spray paint.
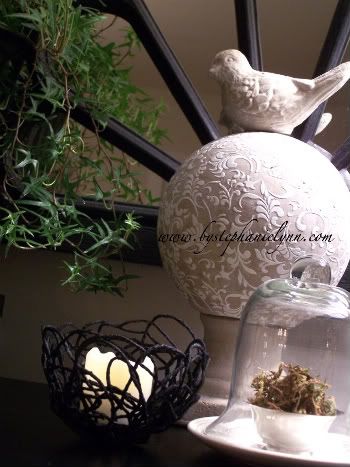
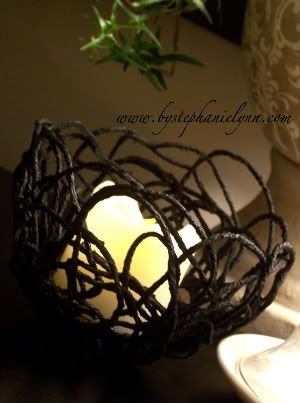 It's darling with a simple votive {I actually used a flameless candle...I have a three year old, need I say more}
 or how about some speckled eggs...
 ...festive carrot bells...
 or simply a little birdie nestled in a bed of greens welcoming spring. {which is finally here today!}
 Thanks again Michelle, I'm honored to have the opportunity!
Come see what else I've been up to over at Under the Table & Dreaming
 I just finished my craft room workshop and have lots more to share ~ Hope you'll stop by and visit!
 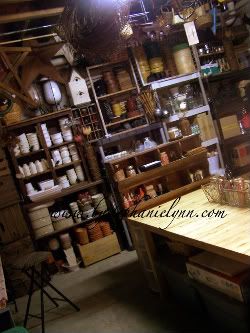 Have a fabulous first week of spring! Enjoy!

That is an awesome knock-off. Inexpensive, easy and adorable. Did you see those carrots made of bells? Holy smokes!!! That is darling. So many possibilities with a beautiful little nest! Stephanie at Under the Table and Dreaming is definitely talented. That's why I asked her to guest post. Go visit her blog today. I know she would love more viewers and followers. You will be inspired by all she comes up with.
Linking to Finding Fabulous, Romantic Home -Show and Tell Friday, Miss Mustard Seed -Furniture Feature Friday, Lit and Laundry - Finished For Friday, The Inspired Room, Remodelaholics Anonymous, Poppies At Play - Creative Cats , Crafts In Bloom, Kojo Designs - Friday Fun Finds, Fingerprints on the Fridge - Feature Yourself Friday. The Girl Creative - New Friend Friday, That's So Cuegly - Craft Concoction


That is adorable and I think that I could actually make that!! Thanks so much for sharing!
ReplyDeleteI'm a huge fan of hers already. I call her the blogosphere's best kept secret. Glad the secret is out! :)
ReplyDeleteWhat a cool project! And it has so many possibilities. I would have thought something like that would have been much harder to make, but it's so easy! Thanks for sharing.
ReplyDeleteAll I can say is wow... my mouth is still wide open....Great project!
ReplyDeleteWOW! Cute, easy, multi-functional. Love it!
ReplyDeleteI love that thanks for sharing
ReplyDeleteIt looks gorgeous. I love it. What a great idea. I love all the different ways you have it decorated. Hugs, Marty
ReplyDeleteWow what a great idea!! I love it and so want to try it, thanks!!
ReplyDeleteI remember doing this in elementary school. What a great update of an old craft.
ReplyDeleteTotally adorable! I'm bookmarking this for sure. Thanks!!!
ReplyDeleteJust darling and I can do this....I know I can, I think I can.......
ReplyDeleteBarbara
How fun!?!? I can't wait to try!
ReplyDeleteKim @ http://frostmeblog.blogspot.com
party inspiration
It looks great! I love it with the grass in it. Thanks for sharing with Made it Monday! Jules
ReplyDeleteWhat a fabulous idea! Your nests came out great...I think I may even like them better than the PB ones!
ReplyDeleteThis is sooooo cool! Thank you for sharing!
ReplyDeleteI LOVE it! Thanks for the wonderful tutorial, I know I'm going to make this! You did a great job!
ReplyDeleteThat is totally adorable! And how simple, yet looks very chic! Amazing!
ReplyDeleteI love your little nest, thanks for sharing it.
ReplyDeleteSo darned cute! What a great idea.
ReplyDeleteI'm totally doing this!
ReplyDeleteI would have never guessed this was yarn - I thought it was wire! It's lovely and I have a bunch of eggs I've been trying to use.
ReplyDeleteI thought it was wire too! What a cool idea, I think I just found a messy/gooey/fun/gorgeous craft for the kids and I to do together! Thanks for the inspiration, Theresa
ReplyDeleteDarling and great idea!
ReplyDeletewww.monkeyshinebusiness.blogspot.com
I tried this with white glue....now I Know!
ReplyDeleteWhat cute and simple craft...thanks for the "low-down" on it!
ReplyDeleteBlessings,
Linda
Fabulous idea! I love this. Thanks for sharing and for the tutorial of it.
ReplyDeleteThis is proof that sometimes the simplest things really are the best things! I love it! You did a wonderful job on those nests!!
ReplyDeletehttp://classiclyamber.com/blog/
I love it! That is so great!!!
ReplyDeleteI love this! My daughter and I did a child version of this. I blogged about it, but of course gave you full credit!
ReplyDeletehttp://agnesrhodes.blogspot.com/2010/03/lexi-time.html
Thanks for the inspiration!
So sute!! Oh my..your workshop is making me drool. I love your style. Thanks for linking at LSL.
ReplyDeleteWow, this is such a great idea! Those nests are wonderful.
ReplyDeleteThank you for linking this up to A Little Craft Therapy with Life in the Pitts.
Very cool!
ReplyDeleteWow! I'm bookmarking this one!
ReplyDeleteThanks for joining Get Your Craft on Thursday. Please join me next week for another great party. Don’t forget to stop by and enter my giveaway. I’ll announce the winner at next weeks party!
I tried this and failed. I may not have waited long enough for the yarn to day. I wanted to use it on a pink wreath I made but did something different to make a nest. I will try it again.
ReplyDeleteCool! I might even try this today!
ReplyDeleteVery cute and easy too--thanks for sharing!
ReplyDeleteI love that! What a great idea and it turned out beautifully!!
ReplyDeleteWhat a beautiful craft room!
ReplyDeleteWhen she said she used yarn I was a bit skeptical as to how it would look but holy cow, this is awesome. I am probably going to go and do this myself as a weekend project! Awesome :)
ReplyDeleteI love this, but I am currently hooked on twine. Do you think it would work with twine instead of yarn??
ReplyDeleteThat is a smart idea. Nice job.
ReplyDeleteThat is so cute! We recently made our own version and had so much fun! Sometimes, the mess is worth it.
ReplyDeleteI love it! Thanks so much for sharing!
ReplyDelete