


Bev at Flamingo Toes is sharing this useful craft with us today!
*****************************************************************************
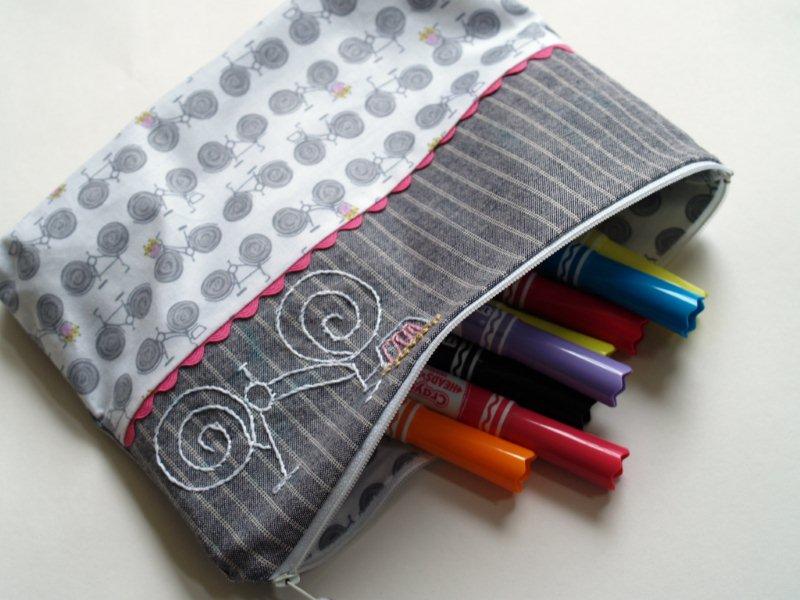
I mentioned to my daughter that I needed to come up with an idea for a Back to School craft, and this school supply pouch was her suggestion. She's a smart cookie. ;)
And since she's also a senior in high school, I thought this was a great craft for any age. Here's the finished pouch we came up with. We thought it would be great for pencils, markers, that sort of thing.

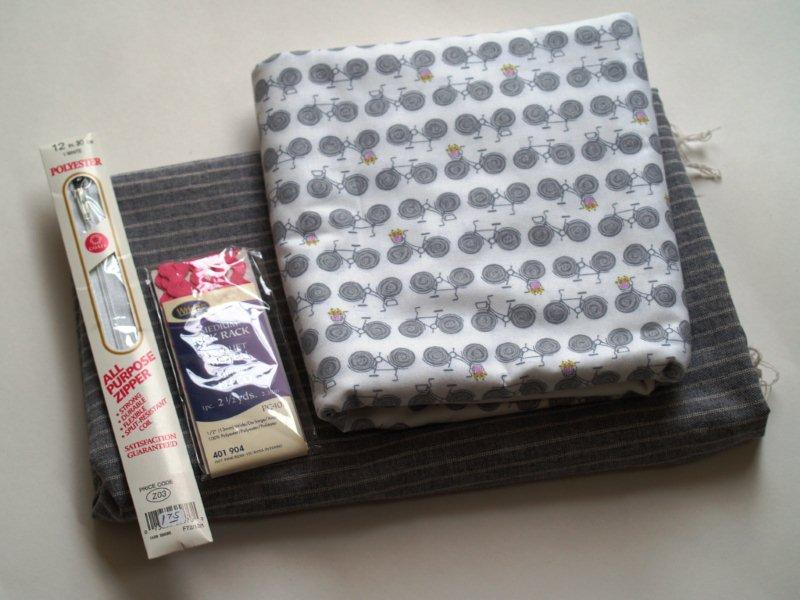
I found this great bicycle fabric on our road trip this summer - I just fell in love with it. But the basic design of the pouch would work well for any cute fabric you have in your stash.
Here's how to make this super easy pouch!
You'll need:
And since she's also a senior in high school, I thought this was a great craft for any age. Here's the finished pouch we came up with. We thought it would be great for pencils, markers, that sort of thing.
I found this great bicycle fabric on our road trip this summer - I just fell in love with it. But the basic design of the pouch would work well for any cute fabric you have in your stash.
Here's how to make this super easy pouch!
You'll need:
- Decorative fabric for outside lower section and lining
- Denim or heavier weight fabric for the top and back of case
- Ric Rac
- 12" zipper
- embroidery thread
Out of your fabric cut the following pieces:
- Decorative fabric: 2 pieces 8" x 11", 1 piece 5" x 11"
- Denim fabric: 1 piece 8" x 11", 1 piece 4" x 11"

(Excuse the kitty inspector in the top corner there)
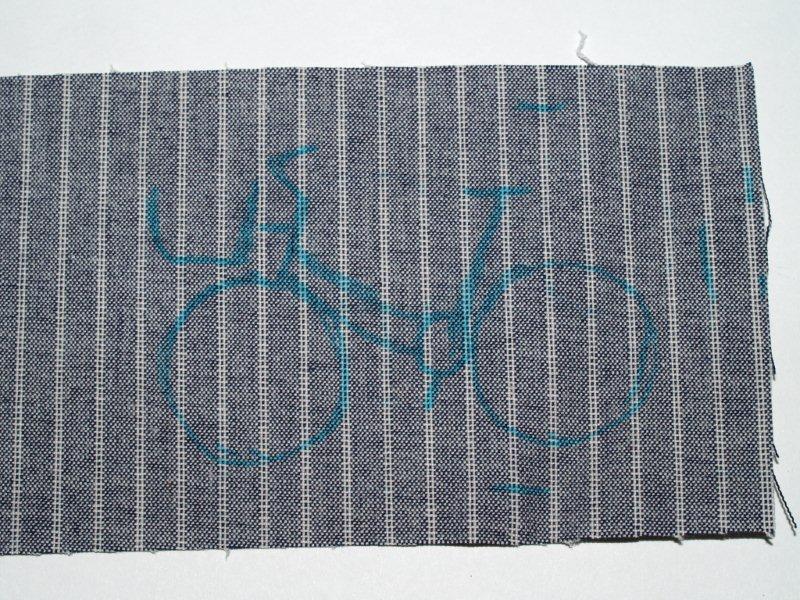
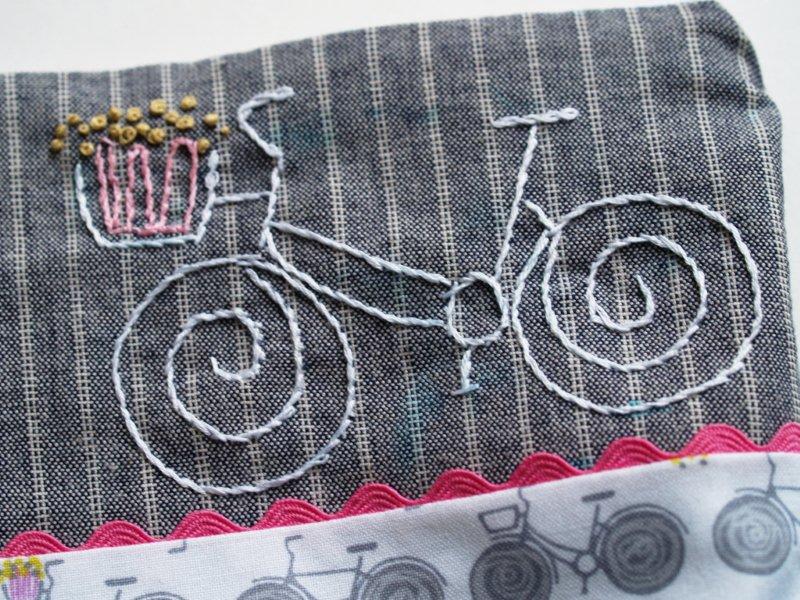
If' you're going to do the embroidery on the top denim panel, do that first. Choose a design that coordinates with your fabric. I redrew one of the bicycles from the decorative fabric. I marked the location of the seams first, then drew the bicycle with a fabric marking pen.
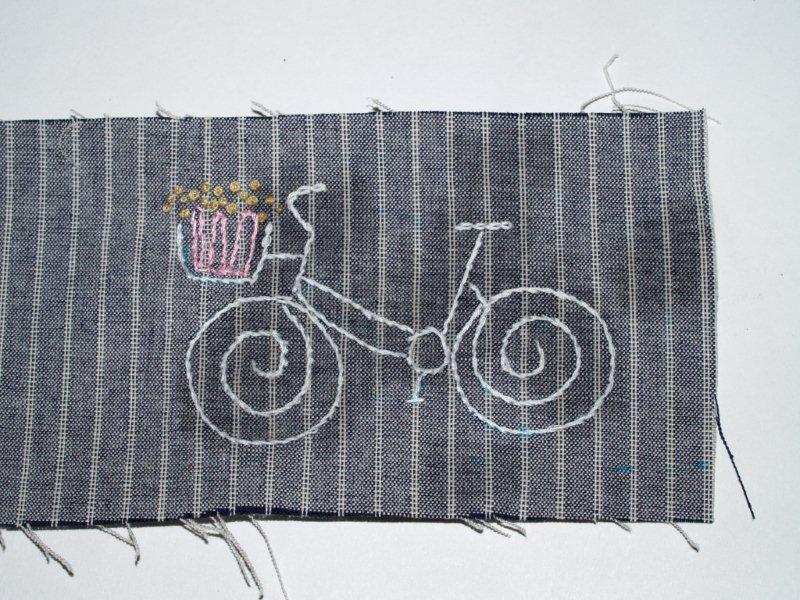
I embroidered the lines with a simple stem stitch and in the basket I used french knots for the flowers. Once your embroidery is done, wet the design to wash away the marker.
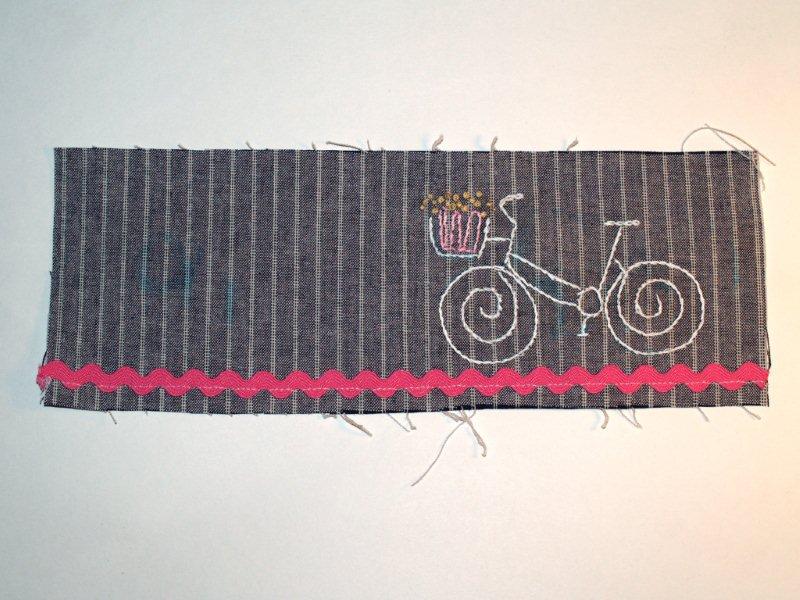
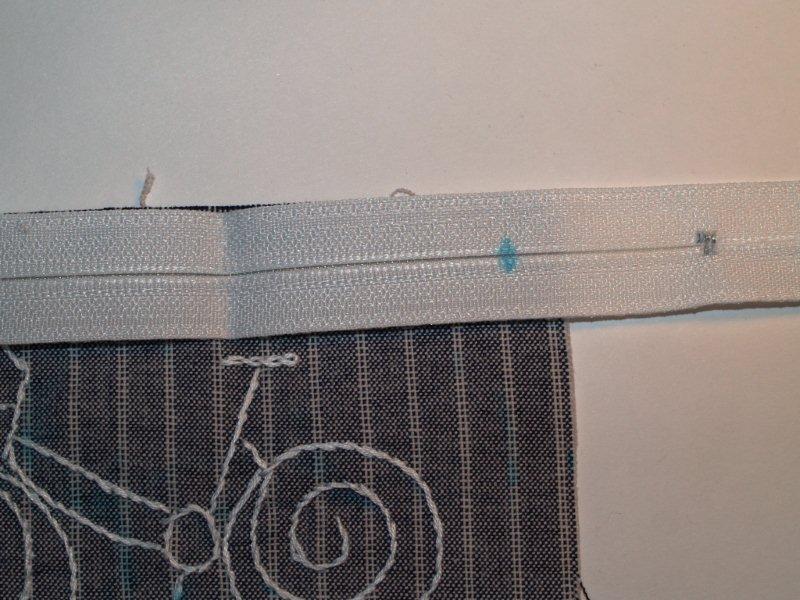
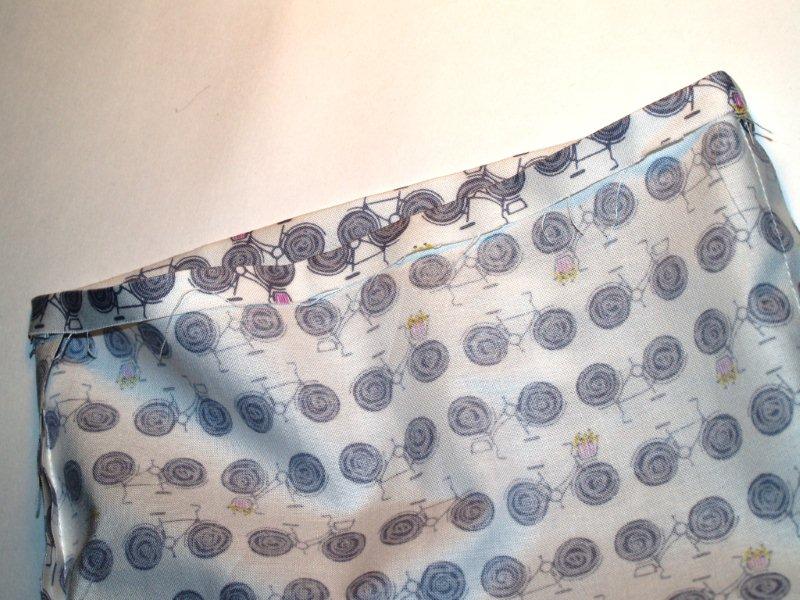
Sew on the Ric Rac border along the bottom edge of the top denim piece.
Now sew the small decorative fabric rectangle to the top piece, right sides together. (I used 1/2" seams for the pouch.) Press the ric rac up towards the top panel.

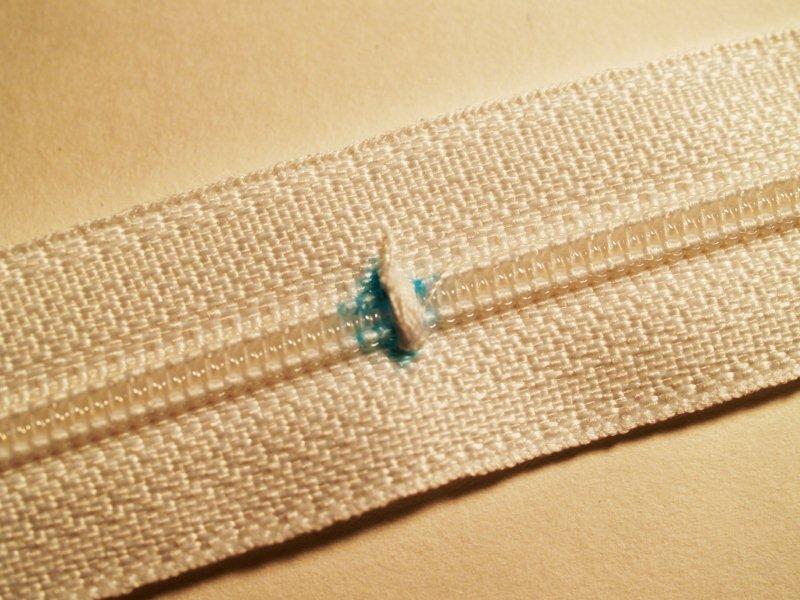
Prepare your zipper. Mine was too long for the pouch but this is easy to fix. Lay the zipper along the top edge and mark where you need it to stop.
Sew a small zig zag stitch over your marking stitch. Trim the zipper 1/2" below line.
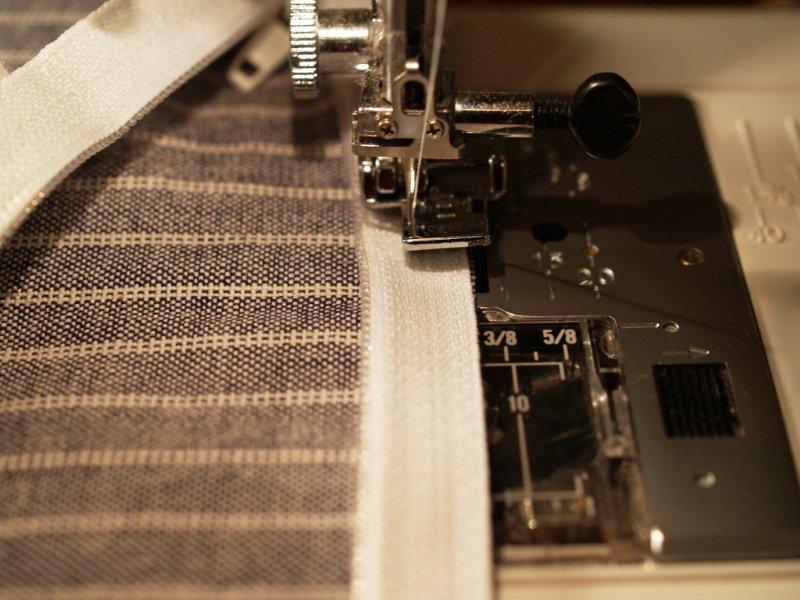
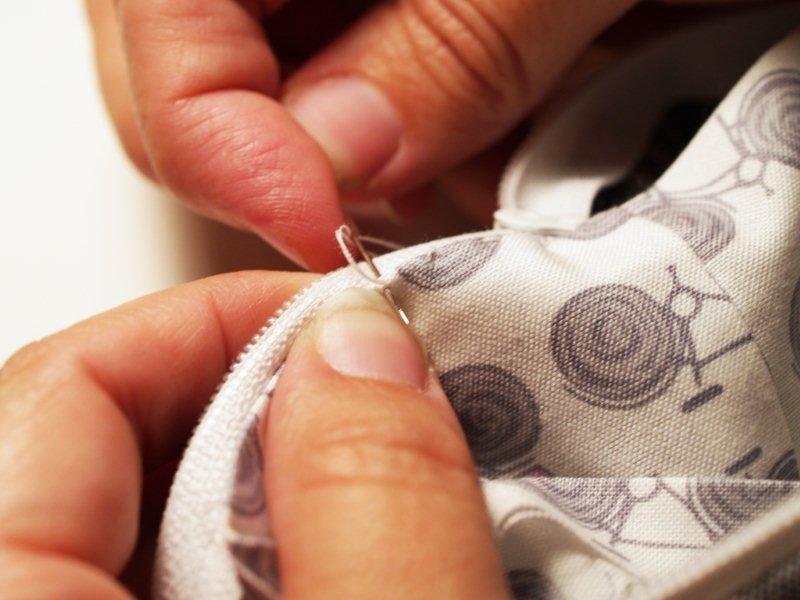
Open up your zipper and sew the right side to the right side of the top panel. Repeat with the back piece of the zipper pouch.
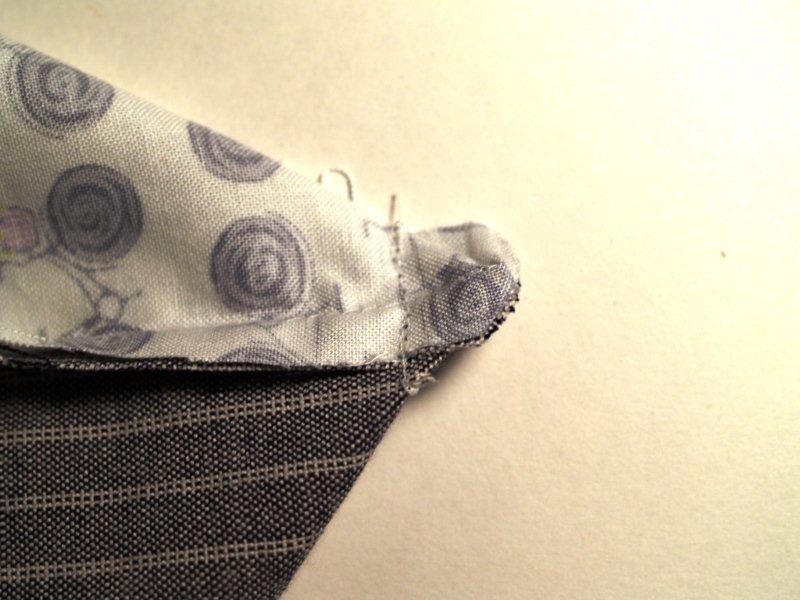
Press the seams down. Put your front and back panels, right sides together and sew the remaining three sides of the pouch. Form a small triangle at each bottom corner of the pouch and sew a line 5/8" from tip of corner. This will make a small flat bottom edge for the pouch.
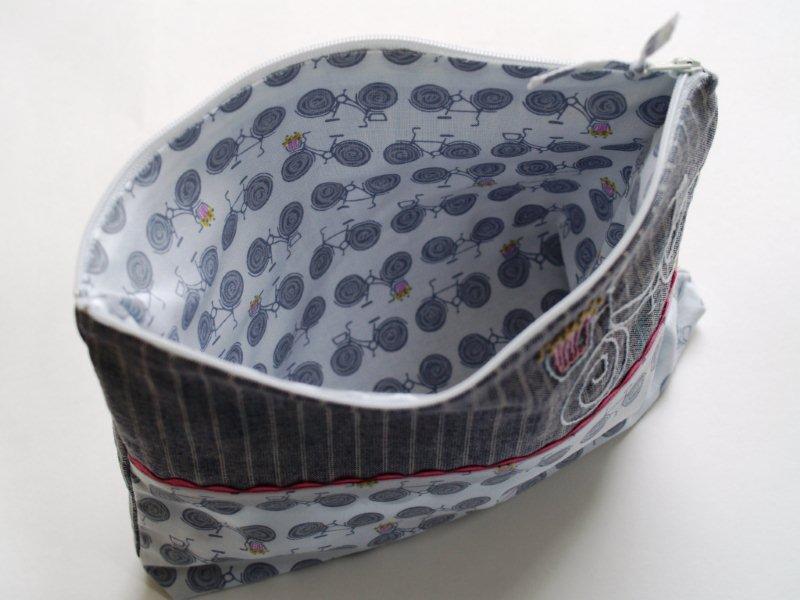
Set the outside piece aside. Place your lining pieces right sides together and sew around three sides, leaving the top edge open. Sew your corner edges in your lining just like you did on the outside piece. Press the top edge down 1/2".
Turn your lining right side out and place inside outer section, so wrong sides are together.
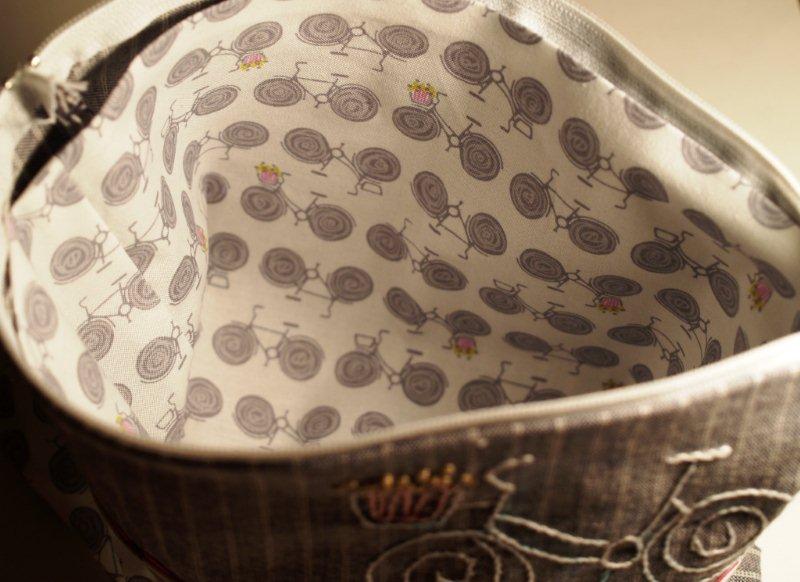
Sew your lining into the pouch, just below the zipper.
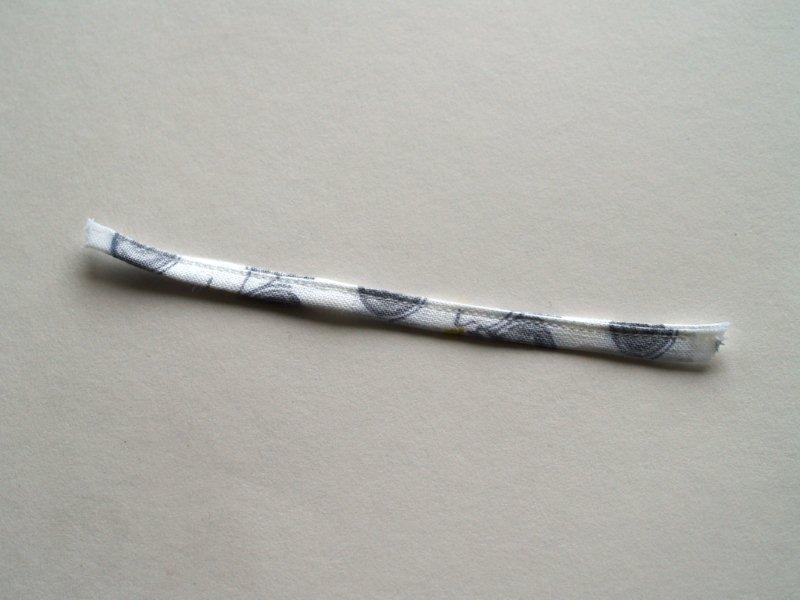
If you would like, make a small fabric tie to knot on the end of your zipper. Cut a piece of fabric 3/4" x 5". Fold the two sides in and then fold in half. Sew close to the folds. Cut the ends at an angle and apply fray check to the end. Tie onto your zipper pull.
And you're all done! You've got a super cute school supply pouch - all ready for your little (or big) one for school!
Thanks to Bev at Flamingo Toes! She's super talented. See how talented she is by visiting her blog.


Yay, Beverly! This is an awesome tutorial!
ReplyDeleteOh i just love this, but do i dare to try anything with a zipper.
ReplyDeleteI love this project!! Great tute, Bev!!
ReplyDelete