


Wooden Damask Pumpkins

and I recently did these Spray Painted Pillows

Here is the project I am doing for you today!
Paper Bag Pumpkins!

Most of the supplies you probably have already in your house, so you can make them for FREE! (or next to nothing if you have to buy paint and wire)
I made my first set 9 years ago when I was a newly wed and had no decorating fund, and believe it or not, they have survived those 9 years and are still going strong! In fact, the first year I had them, my husband told me to just throw them away and remake them the next year because they would never survive a year. Boy was he wrong and was I glad I didn't follow his advice! :) Lets get started...
What you will need:
*brown paper bags (I use the kind from the grocery store- you can use the small lunch ones, but your pumpkin will be super small and not as sturdy) If you want them really big, you can buy the super large paper yard- or leaf bags in the gardening center.
*Rubber Bands
*Paint
*Wire and Rafia, or ribbon (totally optional)
*Filler (I use grocery sacks, newspaper, or paper shreds from my shredder)
Step One- prep your paper bag by carefully removing any handles, then slowly and carefully open up the seams on the bottom. You should have a nice square paper tube when done.


Step 2- Scrunch up your tube and twist and wrinkle it (this will make turning it inside out later much easier and it also gives your pumpkin a great texture) I do mine length wise.

Step 3- Gather up one end of your bag- being careful to get all edges in- and tie it off tightly with a rubber band about 1-2" from the edge.


Step 4- Now VERY CAREFULLY and slowly turn it inside out. I find it easiest to sort of "plunge" the rubber band end downward while I carefully pull the edges of the other end up and around (it will make more sense when you do it!) This is the part that you have to be most careful because it can tear pretty easily during this step.

Your paper bag should now be kinda bowl shaped with the rubber band part at the bottom on the inside.

Step 5- Fill your pumpkin with bags, or crumpled up newspaper, or paper shredings. The more tightly you pack the filler, the sturdier your pumpkins will be - just don't fill it too full or you can't close it.

Step 6- Now gather up the edges same as you did in step 3. This time you will really need to make sure that all the edges are pulled in. Gather it tightly and tie off with another rubberband. (this part forms your stem, so you will want it atleast 1" long)

It should now resemble a Pumpkin!

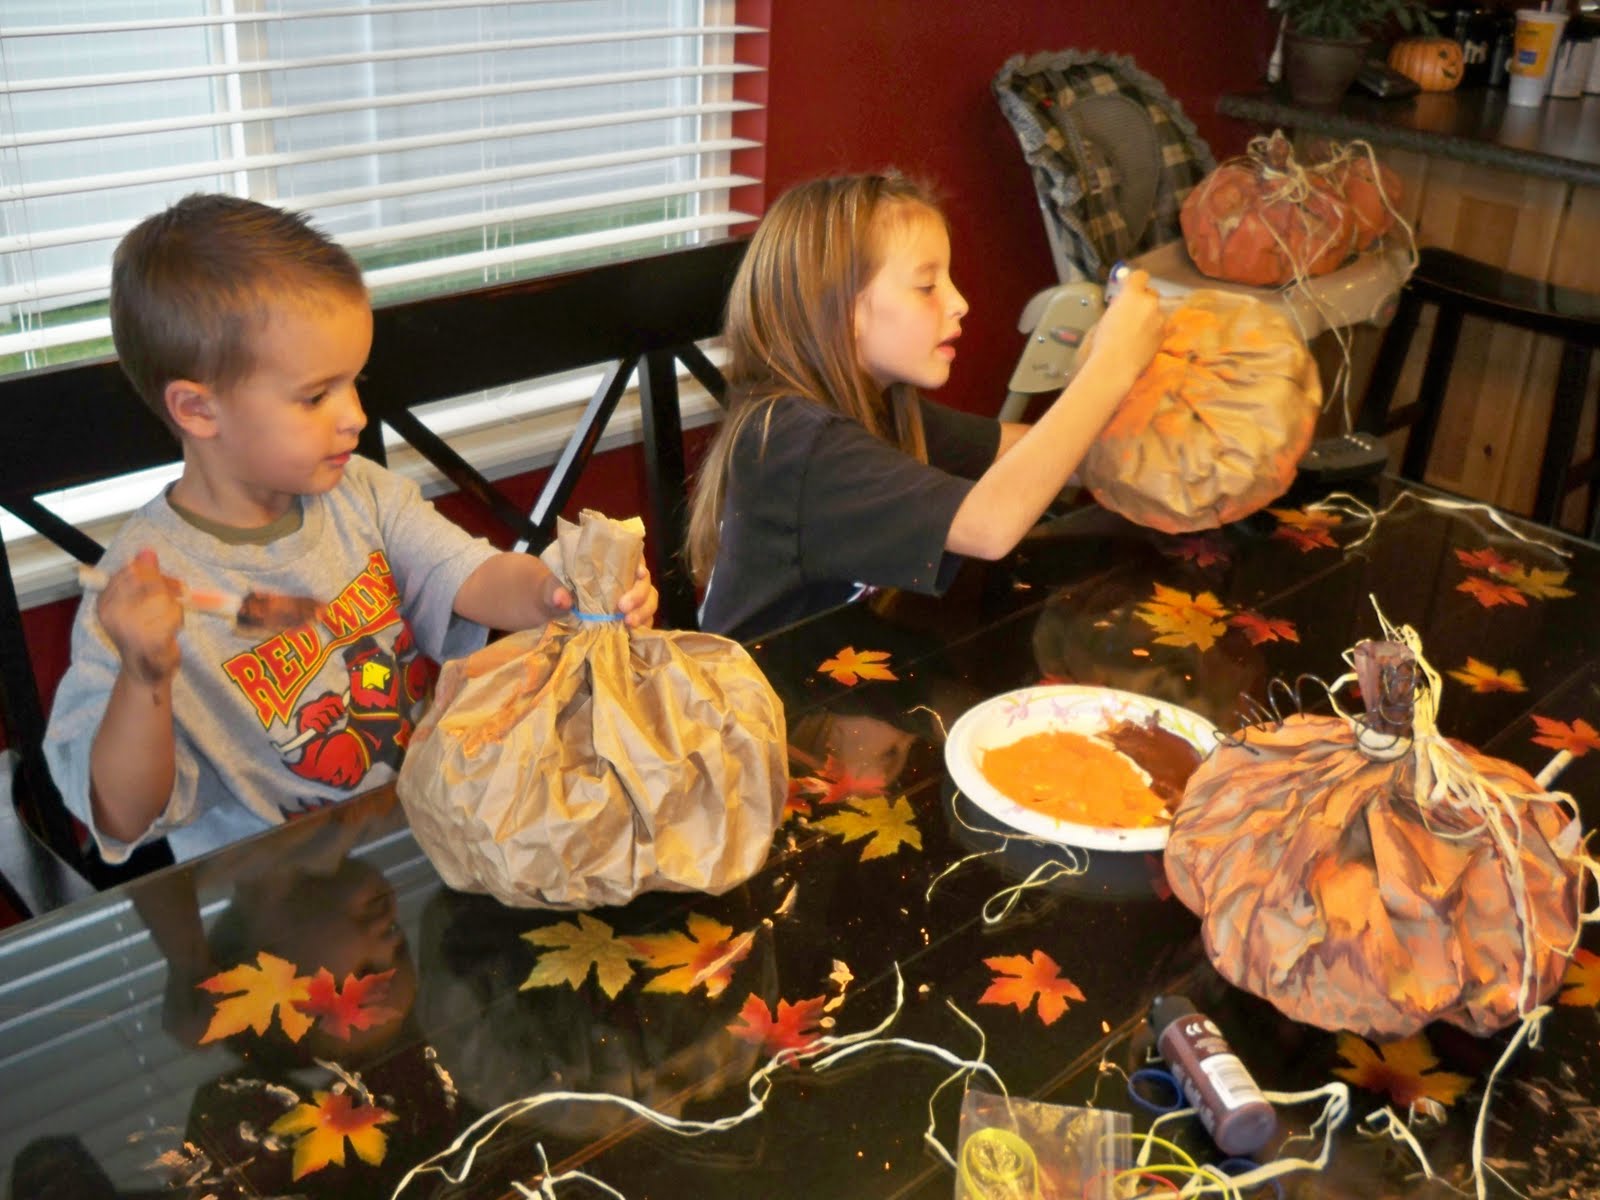
Step 7- Paint your pumpkin with orange paint, then add a little brown to the high ridges for some shadowing if you want. I also like to paint my step brown. (You don't have to get the paint in every little crevice. In fact, it looks really cool if you don't)


Let the kids join in on the fun too!
Step 8- Wrap some wire around the stem and curl it with a pencil, and if you are good with wire, you can form some leaf shapes like this.


Top it off with some Rafia or ribbon would be super cute too!


Easy Peasy, right? Over the years I have had more comments on these pumpkins than any other decor I have, and people are always shocked to find out they are made from paper bags! The paint will harden them and give them a "leathery" feel.
.
Hope you have fun doing this, and include your kids! My kids love doing these! It also makes a great group craft night since it is so cheap- so get together with your friends and make some great pumpkins for your Thanksgiving centerpiece!
Stop by You Craft Me Up! for more great Holiday ideas!
Thanks again Michelle for this opportunity! You are the best! :D
You Craft Me Up has AMAZING holiday ideas! You go see these floating ghosts and headstones!!! Maria has some totally awesome ideas! Visit You Craft Me Up and let her help you Craft Up A Storm of creativity. You will love this blog!


Thanks Michelle! You made it look WAY better than I had!
ReplyDeletevery cute! Going over to look around!
ReplyDeleteblessings
barbara jean
These are very cute!!!
ReplyDeleteVery Cute! I love that you used grocery bags to stuff them.
ReplyDeleteWhat a great idea!!
ReplyDeletethanks for posting we have made small pumpkins like those that are made from lunch bags but never big pumpkins I think I will try my hand at that
ReplyDeleteOooooh, I have all the stuff to make these. YEAH!!! So cute. Thanks for sharing!
ReplyDelete